These won’t be full posts on making the bread but just documenting how they came out. This time I did try to do normal kneading method. I don’t know again if my starter was up to snuff – though I did get good air holes in the final result. Also I’m running low on bread flour so used some AP flour as well as some wheat flour.
Ingredients:
300 g AP flour
100 g bread flour
100 g whole wheat flour
360 g warm water
200 g starter
12 g salt
I did do an autolyse of the flour and water for about 45 minutes. I then added in the starter and salt. I proceeded to knead (Richard bertinet slap and fold method) for about 15 minutes. It came together some but was still fairly sticky. I use my oven proof setting for an hour and fifteen minutes. I then laid on a flour surface and formed it into a boule. This I placed in a bowl that had a well-floured kitchen towel. I ended up putting it in the fridge after about 30 minutes because I had to run an errand. I returned, removed from fridge and let it proof another hour or so. I preheated the dutch oven at 500F and then baked for 15 minutes covered and an additional 20 minutes uncovered.
It has been colder here in Sacramento as of late so we’ve been craving more hearty fare like soup. We are also trying to be a little bit healthier and soup is a decent way to do that. To go along with soup, I thought I’d whip up some small wheat boules (in reality this was earlier this week that I did this). I wasn’t sure exactly if I was going to do some rolls or what. I compromised and did some boules.
Ingredients:
200g whole wheat flour (Trader Joe’s)
200g bread flour (King Arthur)
280g lukewarm water
31g honey
1-2 Tbsp vegetable oil (eyeballed)
8g salt
2 tsp active dry yeast
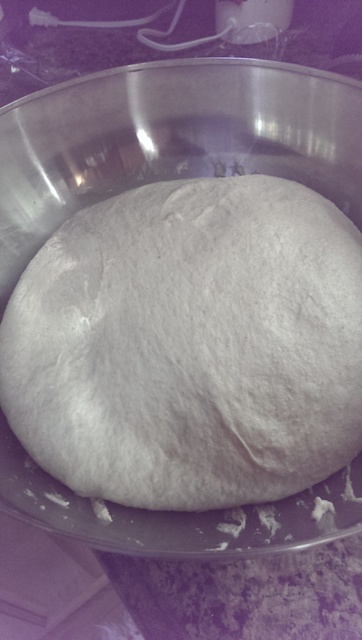
As is typical, I weighed out and mixed all the ingredients above into a somewhat wet cohesive mess and then let it autolyse for about an hour. After this, I dumped it onto the countertop and kneaded it (combination of slap and fold, regular kneading, etc) for 10-15 minutes. Then I let it bulk ferment in a bowl for 1.5 hours.
Before ferment
After ferment
Because our house has been cooler, I started the oven at 350 F and let it start warming up for about 90 seconds, then shut it off and put the dough to ferment in the oven (just above room temp). After the dough had doubled in size, I dumped it out and performed an envelope stretch and fold (repeated two times at 30 minute intervals). Then I poured the dough on the counter, flattened it and separated it out into three (2 parts equal size and 3rd part slightly smaller). So now I had enough for 2 boules and something else. I ended up doing a longish roll type shape for the last one. The two boules I shaped and put into bowls for final rising. The roll-type thing I just let rise on the counter covered.
I pre-heated the loaf pan and my dutch oven in a 450 F oven. Once the dough reached peak rise (press down on dough, it bounced back about halfway), I put the 2 boules into the dutch oven and cut the top of each. I cooked the bread for 10 minutes in the covered dutch oven and then removed the cover from the oven and dropped the temperature to 390 F.
After 10 minutes uncovered
I cooked the bread for another 15 minutes (plus 3 more minutes) and it was a nice dark brown color.
My scoring created some neat decorative marks on the top of the bread.
The crumb
I used up the last of my yeast. I purchased this jar of yeast awhile ago and have kept it in the fridge. It definitely saw its way through a lot of loaves of bread and pizza. Good stuff.
Quick bread update. I decided to use more of my sourdough starter to make this week’s 50% whole wheat sandwich bread. This week I essentially used the same recipe as last week’s but with the addition of the sourdough.
Recipe:
80g sourdough starter (100% hydration)
300g 100% whole wheat flour
255g bread flour
145g rice milk
260g water
18g salt
35g honey
1/4 c. vegetable oil
5g yeast (cut down the yeast to see if the starter has some oomph to create rise)
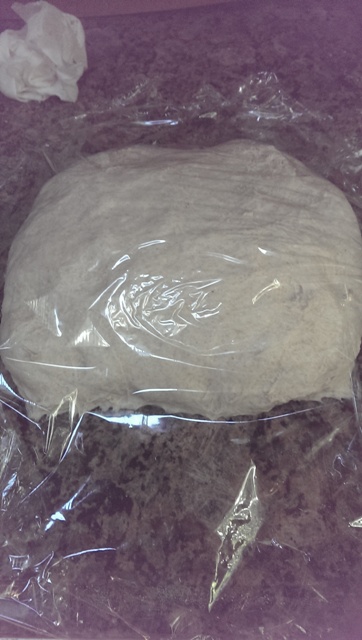
I combined all the above ingredients into one giant slurry and let it auto-lyse for 30 minutes. I am always amazed how the dough goes from a ragged mess to a cohesive and firm dough.
After mixing
After slap & fold kneading
After bulk fermentation
I did the slap & fold kneading for 15 minutes. Each time I do this, I get better and better at sensing/feeling the dough coming together and becoming less sticky. The first time I did this, I had no idea how long I was supposed to knead for and ended up doing the slap & fold for almost an hour.
After I finished the slap & folds, I put the dough in a clean bowl and let it bulk ferment for an hour. As seen above, the dough really formed up very nicely. Following bulk fermentation, I dumped the dough out on my lightly floured countertop and performed a stretch and fold (envelope style) and placed the dough back in the bowl for 20 minutes. Once more I did a stretch and fold followed by the initial shaping. This involved de-gassing the dough and creating a square shape. I then folded the dough down from the top to the middle of the dough and pressed this down. Subsequently I pulled the dough once more to me and pressed down to seal it (essentially creating a log shape). I then bench rested the dough for 5 minutes and then re-shaped into loaf shape. The dough was then placed in a well-greased (butter) 9″ x 5″ loaf pan.
I allowed the dough to proof for about 45 minutes (the kitchen was warm because I was also making pizza). As with last week, the dough had risen really well. I did the finger poke test and noted the dough was well proofed.
The bread went into a 425 F oven with water spraying. I let it bake at this temperature for 10 minutes. I dropped the oven to 375 F and baked the bread for another 25 minutes. By this time, the top of the loaf was a nice dark brown color and the internal temp 187.7 F. I read that enriched bread (which this is) is done between 185-190 F and you can let it go until 205 F if you want a really crunchy crust. This time I decided to remove it a littler earlier to see what kind of difference it would make (last week’s was around 195 F).
After slicing, I noted that the bread was just slightly underdone. If you look at the cross-sectional view of the crumb, you’ll notice at the bottom part of the bread, the crumb is a bit collapsed and not well-aerated like the rest of the bread. Next time I’ll probably try to get it closer to 190 F internal temperature.
Slightly underdone
This bread turned out good, still a little weaker than I’d like for a sandwich bread. I wonder if I toasted it before making my sandwich if it would hold up a little better. The wife said that it is softer than last week’s effort.
In other news, we were able to top our pizza with some homegrown arugula. We decided to try some lettuces this year in our raised vegetable beds. This was a first and out of the 4, the arugula is the only one that grew well. There was a different lettuce that initially grew well then one day was all gone. I am suspicious the local wild turkey came over and chomped it all away.
Since we’ve been suffering from triple digit heat the last week, I wasn’t planning on making bread this week (hot oven just makes the kitchen that much hotter, especially because we don’t actually have an A/C register in the kitchen – I blame the previous homeowner). However, the wife asked for bread (and/or tortillas) for the week for lunches and of course I obliged with both. I decided I was going to try a 50% whole wheat sandwich loaf baked in my 9″ x 5″ bread pan. I started this whole recipe fairly late in the day (around 2 pm Sunday) and with no poolish. I also did not follow a specific recipe this time.
I did read up on the things you should do when using a whole wheat (whole grain) flour. The extra outer layer on whole grains basically acts like razor blades when you’re trying to develop gluten. I elected to do a 50:50 mixture of whole wheat flour and bread flour because bread flour has a higher gluten content and should allow for good rises/proofing. And while maybe not technically healthy, having 50% whole wheat is healthier than pure white bread. Other tips I read were to make sure that you included some fats (oil) to help with dough texture. I incorporated some honey to help with taste.
50% Whole wheat sandwich bread recipe:
300g – 100% Whole wheat bread flour
300g – Bread flour
145g – Rice milk
305g – Water
18g – Salt
35g – Honey
1/4 c. – Vegetable oil
10g – Active dry yeast
I mixed up all the above ingredients and let the well-incorporated mixture rest for 30 minutes to allow the flour to absorb all the water. I then proceeded to knead the dough for about 14 minutes using the Richard Bertinet slap & fold method. I could really feel the dough developing good structure this time (before I used to just keep slapping and folding forever not entirely sure that it was developing the gluten structure that I needed). I know because of the whole wheat and its tiny razor blades I needed to make sure the dough was well kneaded. After kneading, I allowed the dough to rest in a large bowl for the bulk fermentation. Bulk fermentation can go anywhere from 1-2 hours depending on temperature. With the aforementioned heatwave we’ve been experiencing, the inside of the house has been around 81-83 so I knew that rises and proofs most likely would be shorter than I expected.
After about 50 minutes I checked on the dough and it had more than doubled in size (~2.5x original). I poured the dough out carefully on a lightly floured countertop and did a stretch and fold a few times. I replaced the dough into the bowl and allowed it to sit for 25 minutes.
Beautifully formed dough
The dough had come together nicely (and was not the sloppy wet mess that was my previous attempt at whole wheat bread). I did the envelope fold which helps de-gas the dough somewhat. This was followed by a 10 minute bench rest.
Bench rest
I then formed the dough into the proper shape for the bread pan, ensuring I created a nicely tensioned top portion.
Shaped for the bread pan (9″ x 5″)
I lightly floured the top of the dough and covered it with a lightweight cloth to proof. I set the timer for 60 minutes but started checking the dough after about 30 minutes (due to the heat of the kitchen). I also pre-heated the oven to 425F. The way to check whether a bread has proofed properly, at least from what I’ve read thus far, is to take a lightly floured finger, press the dough down and see what happens. If it stays down, it has over-proofed, if it bounces back fully it isn’t ready yet (under-proof) and when it bounces back halfway, then it’s proofed.
Muffin top
Nicely proofed
I wanted to create that “muffin-top” like look for the bread, the same look you get from store-bought sliced bread. I had to look up the dough size I needed to create this, since my 9″ x 5″ bread pan is larger than the standard size. From my research, I came up with a dough around 850-900 grams. As you can see above, I achieved that look I was going for. I had recently ordered some spray bottles so I could spray the oven/bread as it went into the oven to create that nice top crust. I popped the bread pan into the oven, sprayed it and shut the door quickly in my 425F oven. After about 15 minutes, I dropped the temperature to 375 F and sprayed it once more time. A total of 40 minutes baking created the perfect color and doneness (I checked the internal temp which read around 197F).
Nice firm crust that sounds hollow when knocked
Good muffin top appearance
Since I’m not planning on cutting it until tomorrow when I make my work for lunch, you’ll just have to check back later to see how the crumb and taste turned out. Enjoy!
Since I’m starting to feel more comfortable with bread making, I decided I should try my hand at making something that is a little healthier. We had switched from buying bread to me making tortillas for wraps for our lunches (less dense, less calories). Somewhere along the way I started to get interested in making bread and I want to try to keep this new hobby as healthy as possible. I most definitely will not stop making other white breads and such, just thought I should try to do some healthy breads.
Poolish
100% Whole wheat bread – 240 g
Water – 240 g
Instant yeast – 2 g
Remaining formula
100% Whole wheat bread – 480 g
Water – 480 g
Olive oil – 50 g
Honey – 75 g
Instant yeast – 3 g
Salt – 3 tsp
I must have done something wrong with my conversions because this created an almost 100% hydration dough. And it all just went downhill from there.
After sitting overnight
The poolish came out fine as above. However, I then mixed up the poolish and the above remaining ingredients. As I was doing this, I was thinking to myself that this hydration was a bit high. I let the dough do its normal rest and then did the stretch and fold method for 3 minutes, then let it rest. I repeated the stretch and fold method at 25 minute intervals but the dough just did not seem to be coming together, it remained a very moist and weak structure.
I finally gave up on it developing any sort of strength and form. I elected to throw it into my breadpan and see what would happen. As expected, it didn’t turn out great. There was no good proofing and oven spring and it came out as an inedible brick.
Moist mess in the bread pan
Brick bread
Dense and not good flavoring
The above happened on Saturday. I worked Sunday and so to make myself feel better I whipped up a quick white bread boule (I did add a little whole wheat flour into it).
This bread had the following formula:
Poolish
170 g bread flour
170 g water
1/4 tsp (2g) instant yeast
Remaining mixture
100 g bread flour + 30 g whole wheat flour
180 g water
10 g salt
3 g instant yeast
I mixed the poolish (overnight in fridge) with the remaining mixture and then let it sit for 30 minutes to allow some autlyse (let the flour absorb all the water). I then followed the Richard Bertinet slap and fold. I feel like I’m getting a better hold of this kneading method as the dough started to form up and come together after only about 10-12 minutes of kneading. I formed it into a ball and then let it bulk ferment for about 1.5 hours. It’s been warm here and the bread probably didn’t need to ferment that long but I also needed to fit my long run in so I let it go a little longer. I did 2 stretch and folds with 10 minutes between them. By now the dough had developed good gluten and structure. I was able to form the dough into a nice boule and did the drag method on the counter to create a nicely tensioned top portion of dough. I then placed it into a well floured cloth in a bowl to let it proof. After about 1 hour of proofing, I tossed it into my pre-heated dutch oven (450 F) and covered it. I let it cook for 20 minutes covered then removed the lid and turned the heat to 425 F and let it go another 20 minutes. By then it had a nice brown crust and I checked its internal temp (~195F).
Looks good!
Overall I’m happy that I seem to have the basics down. Now I just need to work some more on the whole wheat stuff. I think that tweaking the hydration level will probably allow me to create a better product next time. I should have paid attention that I was creating an essentially 100% hydration dough.
For dinner I also did pizza and I’m getting better at developing pizza dough that isn’t too loose. I think one problem I’ve been having in the past is that I let the dough go way past what it should (over-proofing). Before I had just been blindly following someone’s recommendation on the Jim Lahey No-knead but now I actually am listening more to the dough.