Overexuberant yeast

This week’s bread baking session did not go as planned and resulted in a not so great product.  I’ll still eat it because that’s just me but the wife already has given it a big thumbs down.

I started things off by creating a poolish or preferment.  Essentially you mix a small amount of water, flour and yeast and let that sit overnight.  This is then added into the final mixture the next day.  A preferment is used to create more complex flavors in the final bread product.

I have been looking at various techniques for folding dough as well as for the final shaping process.  What I’ve been having a tough time with is getting that nice shaped loaf at the end.  Sure the bread tastes good, but I’d like it to also look the part.  So I’ve been doing more online research (reading as well as watching various videos).  I found what I thought might be a good template (here).  I did take away some good information from the video.

I think it all went wrong right from the start.  I had written down my recipe/measurements.  Though on the fly I decided to change it and along the way my math went a bit haywire.  I remembered to subtract the amount of flour in the poolish (100g) from the total (500g), but forgot to subtract the water (100g) from the poolish from the total water (350g).  Therefore I ended up with close to 100% hydration bread (500g flour – 450 g water).

I also added in a 30 minute autolyse to this recipe, which was new compared to the last one.  Autolyse is supposed to allow the flour to absorb the water better and actually start the gluten formation process with no kneading.

After the autolyse, I realized that I had a very very wet dough.  As I started my slap and fold, I realized my mistake and thought I’d be able to correct it by adding in the additional flour needed to create a ~70% hydration dough.  I also had forgotten to add the salt so that was added in as well.  After adding in additional flour (~150 g) and salt (10g), I tried to incorporate it into the wet dough and march on.  Much of the new added flour didn’t actually incorporate into the dough and I ended up removing it from the surface.  The result was a decently stick dough but one I could continue to work.  Another change from last time was that I only did the slap and fold method about 20 minutes.  My previous attempt resulted in me doing the Bertinet slap and fold method for about 60 minutes.  After watching some more videos on various slap and fold techniques, I did my slap/fold kneading technique until I felt I had a fairly cohesive dough that would release from the counter with my dough scraper (looking back I realize that maybe I didn’t do this part long enough).

This is also where I added in the new techniques from the above video.  I put a small amount of flour on the counter, and did the stretch and fold method (pulling and folding in third, then doing the opposite way – like an envelope).  I bench rested it for 10 minutes covered in plastic wrap and repeated the stretch and fold method 3 additional times.  Each time, the dough did seem slightly more formed and cohesive though in the back of my mind I knew it wasn’t what it should be.

IMAG2627
Looks okay though you can see the extra gas pockets

At this point there was no turning back so I soldiered on.

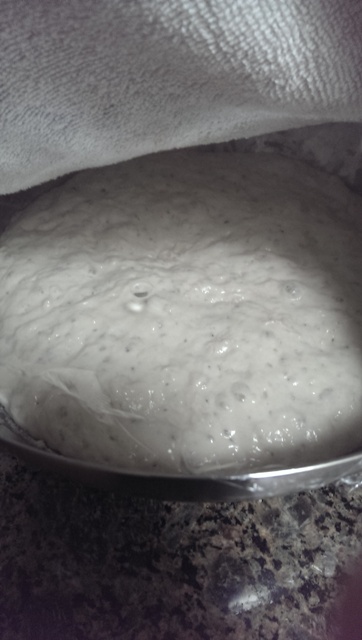
After the last stretch and fold, I lightly floured the dough and placed it in a large metal bowl to bulk ferment (rise).  This is supposed to be done until it is 1.5 times its original size (the video says this can be 2 hours).  I think I messed this part up as well because I let it rise past 1.5 times and it probably was as much as 2-2.5 times its original size.  The dough also appeared to have some large gas bubbles and was not as solid as I expected it to be.

Nevertheless, onwards we marched.  I dumped the dough out on a lightly floured surface and did one more stretch/fold.  Then I tried the tension pull, which did help form a nice smooth surface on the top of the dough.  I placed the dough ball into a flour-sack towel lined bowl (having previously dusted the flour-sack towel with flour to prevent sticking) to proof.  The new video said to proof for anywhere from ~2-4 hours or 1.5 times size.  I knew it wouldn’t take that long so I checked it at 1 hour and then 1.5 hours.  It was hard to say if it had grown 1.5 times.  It was definitely overly gassy (large gas pockets all on the surface).  It hadn’t taken that “firm” texture that I expect after a proof.

At this point I had no other choice but to see what would happen.  I pre-heated by enameled dutch oven in a 500F oven.  Carefully, I removed the dutch oven and placed the bread into the dutch oven and tried to score it.  As I tried scoring it with my knife, half of the dough ball deflated.  I gave up, tossed the lid on the put it back into the oven.  After 10 minutes I removed the lid and dropped the temperature to 475 and baked for another 30 minutes.

The end product didn’t come out as I wanted.  The oven spring was not as dramatic as I was hoping, but I knew that would probably be the case given the deflation upon putting the bread in the oven.

I let the bread cool as the wife and I headed out for dinner and drinks with a friend who was in town.  As a late night snack I wanted to cut into the bread to see what I had produced.  I didn’t think the taste was too bad but the wife said that she wasn’t going to eat anymore than she had (a small bite).

The overall crumb structure wasn’t too bad.  There wasn’t as much taste and I wonder if it was because I switched from regular salt to a sea salt and maybe it hadn’t mixed properly (with my mishap of adding the salt in much later than I should have and not incorporating it properly).

Summary of mistakes: improper measurements and trying to salvage by tossing in more flour and salt after the initial dough had autolysed, possibly putting in way too much yeast and letting it bulk rise/proof for too long. Mental corrections noted.

Onto the next one:  enriched white bread with milk instead of water.

-StewsCat

White bread – Richard Bertinet slap/fold

Over this last year when I first started getting into this baking business I was following the recipes based on their volume measurements (cups, Tbsp, tsps).  As I’ve researched and learned more about bread making, I realized that you often need to rely more on weight measurements when putting the ingredients together.

I invested in the Ozeri Digital Kitchen Scale.  This has helped me more accurately measure out ingredients.

This week I went for a basic white bread recipe and used the following recipe:

  • Bread flour 100% (500 g)
  • Water 66% (330 g)
  • Salt 2% (10 g)
  • Yeast 0.36% (1 g)
  • Added more water, suspect ~70% hydration

I followed Richard Bertinet’s slapping and folding method (here) to work the dough after the initial mixing.  I like this method because  you don’t need to use additional flour when kneading the dough and getting it to come together.  The engineer/math side of me says this makes sense because the recipe calls for a certain amount of flour.  If you’re using additional flour when kneading, then this throws off the original recipe.

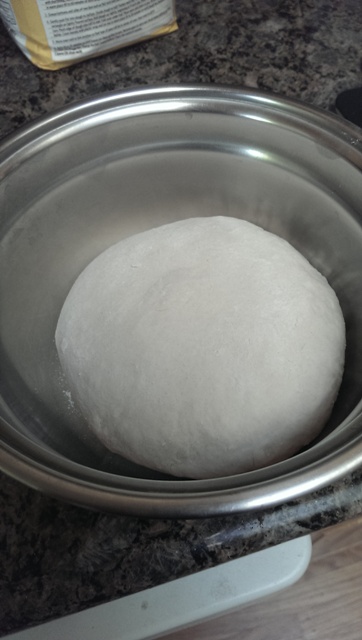
I wasn’t sure how long I was supposed to do the slap and fold method.  In the video, Richard talks about continuing the slap and fold method until the dough is no longer sticky to the touch.  I think that I went a little overboard on how long I did this for.  I slapped and folded that dough for upwards of 45 minutes.  But here is the result:
IMAG2600
After slapping and folding

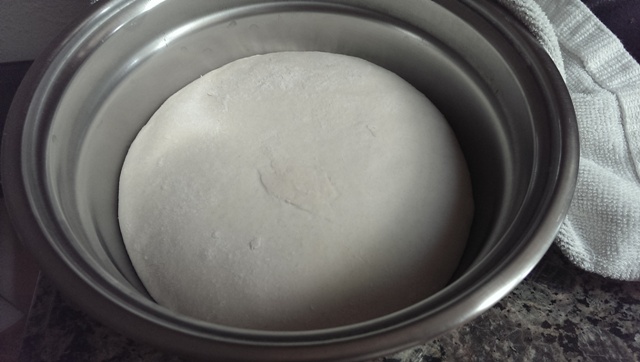
Then I let it rise for a little over an hour (the house was in the high 60s, so a little cool).
IMAG2601
After rising

One thing I did for the first time, again after watching Richard’s video above is some simple folding and shaping prior to splitting the dough up into individual pieces.

My goal for this day was to make a loaf using a loaf pan and also possible a boule (round loaf).  Now I wasn’t sure how much dough I needed to fit into the loaf pan that we have (9 x 5).  I looked online and some people were recommending something like 800-1200g.  My dough in total was maybe 700g.  I ended up making a small boule and using about 500g for the loaf pan.

After letting it proof (I think I may not have proofed it long enough), the loaf pan was hardly filled.
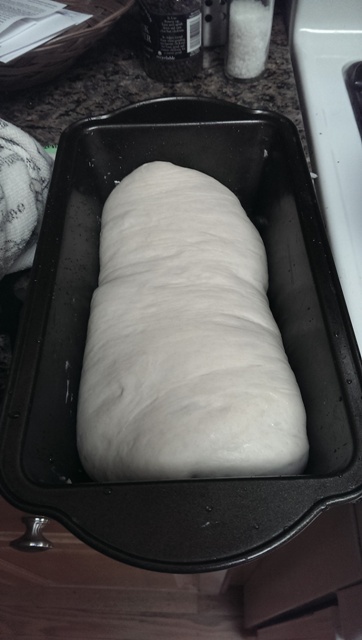
IMAG2609

Next time I will have to use the proper amount of dough to fill the pan.  I pre-heated this Lodge enameled cast-iron dutch oven in a 450 degree oven with the lid off.  Pre-heating will help prevent sticking of the bread to the bottom (my mistake the first time using this dutch oven included letting it proof in the dutch oven).

I cooked the bread at 450 F for 10 minutes, removed the lid and lowered the temperature ot 375 and cooked for another 20 minutes.  I did check the bread with my digital thermometer and found it to be around 210 F, which indicates it is finished.  I hope to one day be able to just visualize and feel the bread to know it is finished so I don’t have to put a hole in the bread with the thermometer.  Finished product below:

I was overall happy with the taste of the bread and used the loaf as scarpetta for a chicken masala (sliced the bread and made garlic bread = replacement for garlic naan).  The crumb was a little tight but worked out for the slices that we made from them.
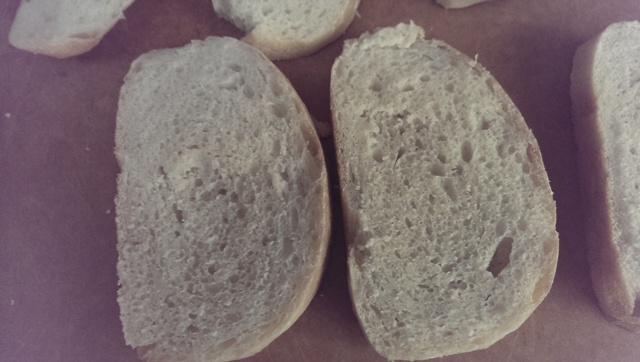
IMAG2616

All in all I was happy with this.  Next up – rustic artisan bread (or that’s the plan at least)

-StewsCat


No-knead pizza dough

I’ve been making pizza from scratch now for a little over a year.  I started by doing a search for no-knead bread/pizza dough because I wanted something simple that also didn’t require a lot of technical expertise.  I’ve been delving into the science behind baking and yeast and all that jazz.  My pizza dough has been evolving over the last year.  Sometimes the dough is too soft and pliable, sometimes it is thicker.  I believe I’ve found a good compromise between the no-knead method and some folding/shaping that provides a decent amount of structure to the dough.

I start with Jim Lahey’s no-knead recipe.  After reading some other blogs, I added in more salt than the original recipe  mostly because the original is underseasoned and Jim Lahey himself pretty much admitted that it could use more salt.

  • 500 grams (3-4 cups) all-purpose flour, plus more for shaping the dough
  • 1 gram (1/4 teaspoon) active dry yeast
  • 16 grams (2 teaspoons) fine sea salt
  • 350 grams (1 ½ cups) water

I recently bought a digital kitchen scale so have been using weight (instead of measured cups) to create my dough recipes.  I think this is a more accurate method and have had good results with this compared to going by the other measurements.

I combine the above ingredients into a mixing bowl, make sure it is all well incorporated and let it sit overnight (12-18 hours) at room temperature.  This method doesn’t require the normal kneading (10-20 minutes) because as the yeast work on the flour and create the gases, they also are kneading themselves (this is why you have to let it sit for so long).

IMAG2592
Flour, water,  yeast, salt – the night before

The next day you have this risen dough full of gas.

IMAG2593
The next day (full of gas)

Rather than just shaping this into the dough balls for pizza (as in the original recipe), I poured the mixture out onto a floured surface.  Here I then stretch the dough in all directions while lightly degassing it.  Then I fold the dough in thirds horizontally (like an envelope), then vertically in thirds, flip the dough, then place it back into the bowl for another 45-60 minutes.  I repeated this process twice and each time you can feel the dough firming up and getting more structure.

IMAG2594
Ready to roll out into pizza


As in the picture above, I then divided the dough into 4 and shaped 2 of them into balls (the other 2 I shape into balls, wrap in plastic then freeze).  I then let these dough balls proof for another 30-45 minutes.

After reading about the various ways to roll out, toss, twirl pizza dough, I’ve come up with a method that works for me.  I take the ball and put it on a lightly floured surface.  Then flatten the dough out and run my fingers about 1 inch from the edge of the dough flattening the dough in the center of the ball and lightly stretching it out into a disc shape.  I continue this around the entire circumference of the dough.  Then I hold one end (the right side) with my right hand and use my left hand to stretch the left side of the dough disc.  Flip the dough over and stretch the right side.  Continue until the disc is stretched out.  At this time you can then pick up the dough and using your knuckles continue to stretch and thin out the dough – leaving the outer 1 inch edge alone so that it forms a night puffy crust.

I make a simple tomato sauce for my pizza using canned San Marzano tomatoes, some basil and some garlic.  Sometimes I’ll add in some tomato paste to thicken up the sauce.

I usually top the pizza with some combination of mushrooms, zucchinis, prosciutto, and/or pepperoni.

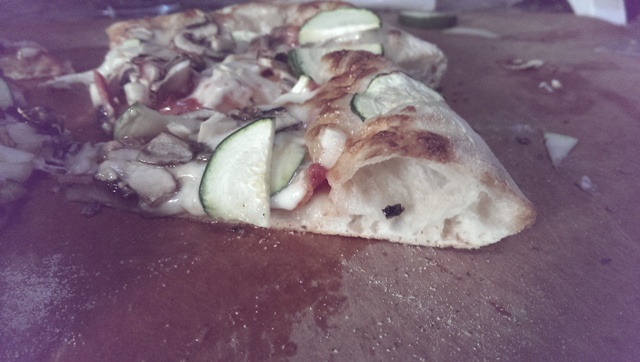
This last time I managed some good air pockets in my crust.

IMAG2598
Big air pockets in the curst

Bon Appétit!

-StewsCat