I’ve been making pizza from scratch now for a little over a year. I started by doing a search for no-knead bread/pizza dough because I wanted something simple that also didn’t require a lot of technical expertise. I’ve been delving into the science behind baking and yeast and all that jazz. My pizza dough has been evolving over the last year. Sometimes the dough is too soft and pliable, sometimes it is thicker. I believe I’ve found a good compromise between the no-knead method and some folding/shaping that provides a decent amount of structure to the dough.
I start with Jim Lahey’s no-knead recipe. After reading some other blogs, I added in more salt than the original recipe mostly because the original is underseasoned and Jim Lahey himself pretty much admitted that it could use more salt.
- 500 grams (3-4 cups) all-purpose flour, plus more for shaping the dough
- 1 gram (1/4 teaspoon) active dry yeast
- 16 grams (2 teaspoons) fine sea salt
- 350 grams (1 ½ cups) water
I recently bought a digital kitchen scale so have been using weight (instead of measured cups) to create my dough recipes. I think this is a more accurate method and have had good results with this compared to going by the other measurements.
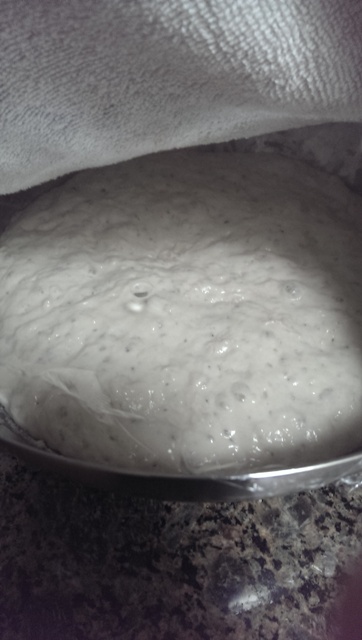
I combine the above ingredients into a mixing bowl, make sure it is all well incorporated and let it sit overnight (12-18 hours) at room temperature. This method doesn’t require the normal kneading (10-20 minutes) because as the yeast work on the flour and create the gases, they also are kneading themselves (this is why you have to let it sit for so long).

The next day you have this risen dough full of gas.
Rather than just shaping this into the dough balls for pizza (as in the original recipe), I poured the mixture out onto a floured surface. Here I then stretch the dough in all directions while lightly degassing it. Then I fold the dough in thirds horizontally (like an envelope), then vertically in thirds, flip the dough, then place it back into the bowl for another 45-60 minutes. I repeated this process twice and each time you can feel the dough firming up and getting more structure.

As in the picture above, I then divided the dough into 4 and shaped 2 of them into balls (the other 2 I shape into balls, wrap in plastic then freeze). I then let these dough balls proof for another 30-45 minutes.
After reading about the various ways to roll out, toss, twirl pizza dough, I’ve come up with a method that works for me. I take the ball and put it on a lightly floured surface. Then flatten the dough out and run my fingers about 1 inch from the edge of the dough flattening the dough in the center of the ball and lightly stretching it out into a disc shape. I continue this around the entire circumference of the dough. Then I hold one end (the right side) with my right hand and use my left hand to stretch the left side of the dough disc. Flip the dough over and stretch the right side. Continue until the disc is stretched out. At this time you can then pick up the dough and using your knuckles continue to stretch and thin out the dough – leaving the outer 1 inch edge alone so that it forms a night puffy crust.
I make a simple tomato sauce for my pizza using canned San Marzano tomatoes, some basil and some garlic. Sometimes I’ll add in some tomato paste to thicken up the sauce.
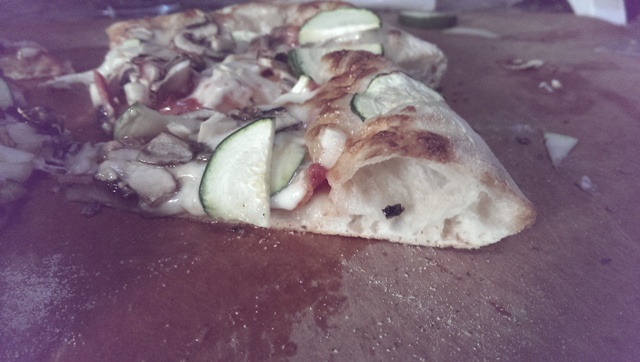
I usually top the pizza with some combination of mushrooms, zucchinis, prosciutto, and/or pepperoni.


This last time I managed some good air pockets in my crust.
Bon Appétit!
-StewsCat
