Bagels!!! (New York style…maybe?)

Bagels!!! (New York style…maybe?)

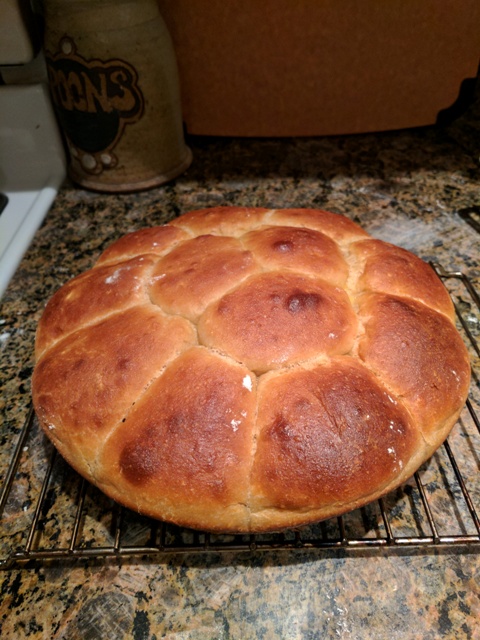
For the 4th of July I decided to try my hand at bagels.  A few years ago the local bagel shop shut down and we haven’t had a good place nearby to get bagels, often settling for some not that great ones from the grocery store.  So I finally said “just do it man.”  After some online research on different recipes and methods, I settled on something that I could accomplish in one morning.  In the end the whole process from start to finish took about 3 hours.

Ingredients

  • 2 tsp active dry yeast
  • 1 1/2 (1.5) Tbsp cane sugar
  • 1 1/4 cup warm water +/- 1/4 cup
  • 2 1/2 cup bread flour
  • 1 cup whole wheat flour (original recipe called for 3.5 cups bread flour but I substituted some whole wheat)
  • 1 1/2 tsp salt

I started by adding the sugar and yeast to 1/2 cup of warm water and letting it sit for 5 minutes untouched.  Then I mixed it up to incorporate it all together.  This formed a collagenous mass (I had never before actually mixed up the yeast after letting it sit in water).

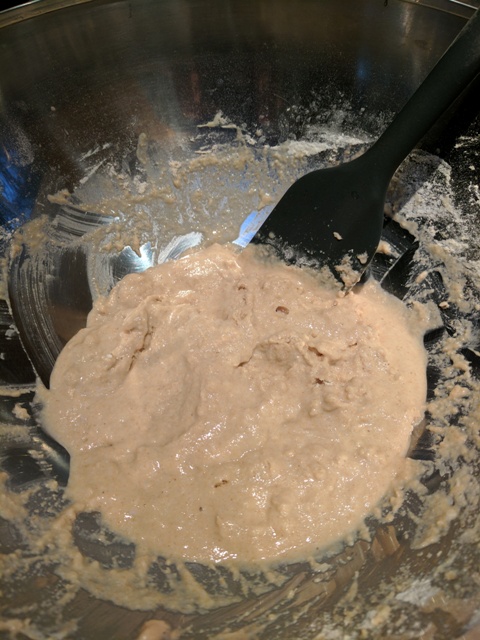
Next I mixed up the flour and salt.  I created a well in the middle and added the yeast/sugar/water mixture and then added the 1 1/4 cup of warm water.  The +/- 1/4 cup of water is dependent on your locale (temperature, humidity, etc).  I ended up adding in an extra 1/4 cup of water but realized this was too wet so incorporated some flour back into it.  This was a relatively dry dough and much easier to knead compared to my bread doughs.  It’s really hard to say exactly how you know if it is too dry or wet but I’ve been working for dough long enough (really it’s not even that long) that I had a sense of how moist/tacky I needed the dough.

IMG_20180704_064639.jpg


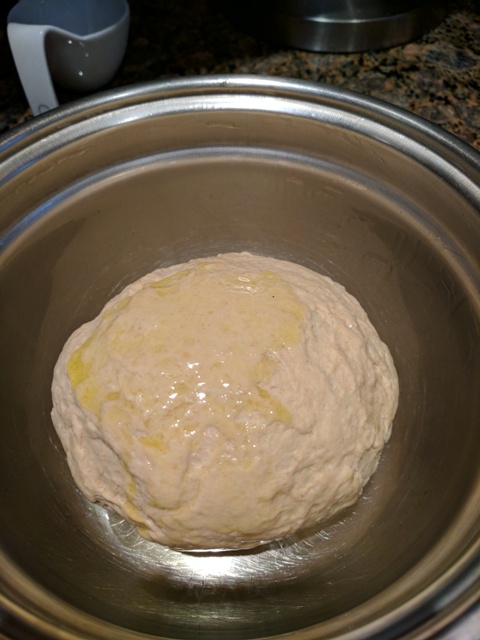
I then proceeded to knead the dough mixture for 10 minutes.  In a lightly oiled (I used olive oil) bowl, I coated the dough ball and covered the bowl with a towel.

The dough was proofed in my oven (proof setting) for 1 hour.

IMG_20180704_074838.jpg

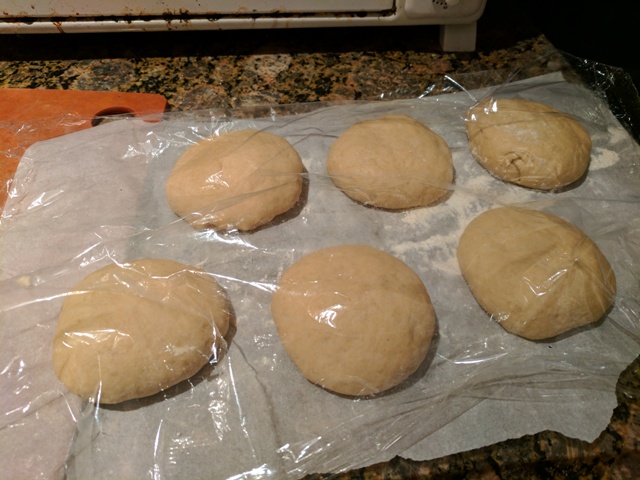
The dough had actually proofed more than twice its original size, I punched it down and covered with a towel and let sit for an additional 10 minutes.

Continue reading “Bagels!!! (New York style…maybe?)”

Advertisement

Whole wheat burger buns

We forgot to buy some bread for the week for lunches and such so I decided I’d give my hand at making a burger bun to use for sandwiches.  I perused a few different recipes online and cobbled together my own version as below.

Ingredients:

  • Warm milk – 1.5 cups
  • Egg – 1 large
  • Melted butter – 4 Tbsp
  • Sugar – 2 Tbsp
  • Active Dry Yeast – 1 Tbsp
  • Salt – 1.5 tsp
  • Whole wheat flour – 3 cups
  • All-purpose flour – 1.5 cups
  1.  Mix warm milk, egg, melted butter, sugar, and yeast in a bowl and incorporate  until frothy.  Let sit for 5-10 minutes.
  2.  In a separate bowl, mix the 2 types of flours and the salt.
  3.  Add wet to dry and mix.
  4.  Dump mixture onto countertop and knead for 5-7 minutes.
  5.  Form into ball and place in oiled bowl and allow to rise (double in size) – ~45 min to 2 hours.
  6.  Punch down, pour onto countertop and separate into 8-10 pieces.
  7.  Let rest for 10 minutes before forming into balls.
  8.  Form each piece into a ball and then flattened to get more hamburger bun shape.
  9.  Allow to rise (mine didn’t rise as much as I’d like).
  10.  Apply egg wash to each bun.
  11.  Pre-heat oven to 380 F
  12.  Place in oven and cook for 15-20 minutes (I did 19 minutes).
  13.  Cover with kitchen towel for 15 minutes – I read this is supposed to help keep the bread rolls soft.

Continue reading “Whole wheat burger buns”

Pita Bread

Pita Bread

So I’ve definitely struggled with what I can make to help us get through the week for lunches while at work.  In the past I’ve done tortillas, loaf bread, and sandwich bread rolls.  D suggested I could make pitas.  So I looked up some recipes and in true me fashion tweaked it to create my own version of things.

Ingredients:

  • 1 cup warm water
  • 2 tsp yeast
  • 1 Tbsp extra virgin olive oil
  • 1 Tbsp sugar
  • 1 cup whole wheat flour
  • 1.5 cup all-purpose flour

I started by adding the yeast and sugar into the water and letting it sit for about 5 minutes.  Then I proceeded to make a poolish with the water/yeast/sugar and whole wheat flour.  I mixed this up thoroughly and let it sit for about 10-15 minutes.

img_20170122_164021

You can see that it is a pretty wet mixture. To the poolish I added the olive oil and the AP flour.  This dough is less water % than many of my breads so came together fairly easily and I hand kneaded for about 5-8 minutes.  I formed the dough into a ball and coated it with olive oil and let it rest for about 1.5 hours.

img_20170122_165459
Before rising

After the dough doubled in size, I punched down the dough and deflated it.  The dough was then divided into 8 balls.

img_20170122_184104

Each ball was then placed on a floured surface and a rolling-pin was used to roll out the dough into about a 6-8″ disc shape.  I had read that there are two different ways to cook pitas.  The oven method creates a great “puff” but the downside is that you don’t get the nice brown spots from the stove top method.  I elected to try both to see which one I felt was better.  I didn’t get the nice separation of the pita as I expected with the stove top method.  I used a cast iron pan for stovetop.  The oven I had at 450 F and a baking sheet (pre-heated).

img_20170122_185038
Rolled out dough

For the pita in the oven, I palmed the dough disc and flipped it onto the baking sheet.  These I cooked for about 3 minutes (sometimes a little more).

The stove top pita stayed flat but I cooked them for about 45 seconds on the first side and 1-2 minutes on the second side.

img_20170122_190046

Here’s a side-by-side comparison of stove top vs oven-baked.

img_20170122_190938
Stove top on the left, oven on the right

Overall they came out decent, though a little dry.  Not too bad and something that may go into the rotation for lunches.

-StewsCat


Whole wheat honey dinner rolls

Whole wheat honey dinner rolls

Our upcoming work potluck is coming up and so I figured since I bake, I might as well try bringing in some homemade baked goodness.  I had done dinner rolls a long time ago, but that was the classic white bread dinner rolls.  I wanted to try something else and so came up with my own recipe for whole wheat honey dinner rolls.

Ingredients:

  • 250 g 100% whole wheat flour
  • 250 g bread flour
  • 200 g water
  • 150 g whole milk
  • 4 Tbsp butter
  • 70 g honey
  • 2 eggs
  • 1 tsp active dry yeast
  • 8 g salt

I needed to figure out a way to make this so I wouldn’t have to actively be involved for a good chunk of it because the potluck is right in the middle of the work week.  I won’t be able to spend 6-8 hours making the bread.  I figured I’d try to take advantage of the long slow ferment to aid in kneading.

I started the dough around 11 pm at night.  I mixed together the above ingredients.  The butter I threw in a small bowl and melted in the microwave. The eggs I cracked and beat prior to throwing in with everything else.  Since the milk was cool, I used warm water and let the yeast sit in it for about 5 minutes before mixing it in with the rest of the ingredients above.

img_20161215_224202
Immediately after mixing

I let this covered mixture sit out on the counter for about 15 minutes and then put it in the fridge.  Initially I was going to pull it out after about 12 hours but I had some chores to take care of and actually removed it from the fridge about 17 hours after first putting it in.

img_20161216_160955
After 17 hours in fridge

The dough was chilled though still sticky and difficult to knead.  I poured this out onto the counter and did some stretch and folds (maybe 3 of them) and tried to knead it but it was just too sticky/unformed.  I threw the dough back into the bowl and let it rest for 20 minutes.  I then did another stretch and fold on the counter.  Slowly the dough was started to form up a little more into a cohesive mass that I could manipulate.  Another 20 minutes of rest and then I did the stretch and folds still in the bowl (to save of having to clean up the sticky stuff on the counter).  After another 20 minutes, I floured the countertop and poured the dough out onto this and flattened it.

Using my scale, I started to divide the dough into 75-80 g pieces.  For some reason my scale malfunctioned about halfway through the dough and I had to eyeball the last half of it.  Each dough ball I formed into a ball and rolled on the counter to get a roughly spherical shape.  I then placed the dough balls into my 12 inch cast iron.  I had some leftover dough and created a standalone ~150 g ball.

img_20161216_174922

I let this proof for about 1.5 hours until the dough appeared ready (I pressed down on it and the dough sprung back almost all the way).  You can definitely see the dough had proofed nicely and filled in the gaps.

img_20161216_192204

I pre-heated the oven to 430 F while the dough was doing its final proof.  An egg wash was applied (beaten egg with some whole milk) just prior to placing in the oven.  Right after putting the cast iron and separate boule into the oven I used my spray bottle to create some steam in the oven.  I baked the bread at 430 F for 10 minutes.

img_20161216_193452
I then dropped the temperature to 375 F and let it go for another 11.5 minutes or so (I had set the timer for an additional 15 but could tell it was done).  The internal temperature of the dough was ~195-198 F.

img_20161216_194625

img_20161216_202057

The individual roll came out a littler darker, probably because it was baked on its own

img_20161216_194631

Overall the bread has a nice soft crumb in the middle and the honey gives it a nice taste.  I also like that you can tear off a roll and it comes off in a nice individual serving size.

img_20161216_202051

-StewsCat

img_20161215_100249

Whole wheat boules

Whole wheat boules

It has been colder here in Sacramento as of late so we’ve been craving more hearty fare like soup.  We are also trying to be a little bit healthier and soup is a decent way to do that.  To go along  with soup, I thought I’d whip up some small wheat boules (in reality this was earlier this week that I did this).  I wasn’t sure exactly if I was going to do some rolls or what.   I compromised and did some boules.

Ingredients:

  • 200g whole wheat flour (Trader Joe’s)
  • 200g bread flour (King Arthur)
  • 280g lukewarm water
  • 31g honey
  • 1-2 Tbsp vegetable oil (eyeballed)
  • 8g salt
  • 2 tsp active dry yeast

As is typical, I weighed out and mixed all the ingredients above into a somewhat wet cohesive mess and then let it autolyse for about an hour.  After this, I dumped it onto the countertop and kneaded it (combination of slap and fold, regular kneading, etc) for 10-15 minutes.  Then I let it bulk ferment in a bowl for 1.5 hours.

Because our house has been cooler, I started the oven at 350 F and let it start warming up for about 90 seconds, then shut it off and put the dough to ferment in the oven (just above room temp).  After the dough had doubled in size, I dumped it out and performed an envelope stretch and fold (repeated two times at 30 minute intervals).  Then I poured the dough on the counter, flattened it and separated it out into three (2 parts equal size and 3rd part slightly smaller).  So now I had enough for 2 boules and something else.  I ended up doing a longish roll type shape for the last one.  The two boules I shaped and put into bowls for final rising.  The roll-type thing I just let rise on the counter covered.

I pre-heated the loaf pan and my dutch oven in a 450 F oven.  Once the dough reached peak rise (press down on dough, it bounced back about halfway), I put the 2 boules into the dutch oven and cut the top of each.  I cooked the bread for 10 minutes in the covered dutch oven and then removed the cover from the oven and dropped the temperature to 390 F.

img_20161127_201302
After 10 minutes uncovered

I cooked the bread for another 15 minutes (plus 3 more minutes) and it was a nice dark brown color.

My scoring created some neat decorative marks on the top of the bread.

img_20161127_203414

img_20161128_210548
The crumb

I used up the last of my yeast.  I purchased this jar of yeast awhile ago and have kept it in the fridge.  It definitely saw its way through a lot of loaves of bread and pizza.  Good stuff.

img_20161127_170820

-StewsCat