No knead sandwich bread

Last week for our work potluck I decided to bring bread since it was easy for me to do and something homemade.  I had already done a trial run on some honey wheat dinner rolls but also wanted a backup.  On my fb feed I saw a posting from King Arthur about how 2016 was the year of no-knead bread.  Now originally when I started my baking endeavors, I started with the no-knead variety just due to the ease of it.  The following link came up the weekend before the potluck.  I really like that you can make this ahead of time and toss it in the fridge for up to 7 days without doing any additional work.  My scale also was on the fritz – which I figured out appears to be due to low battery.

Ingredients:

  • 3.5 cups AP flour
  • 1.5 cup water
  • 1/2 Tbsp salt
  • ~2.2 tsp active dry yeast

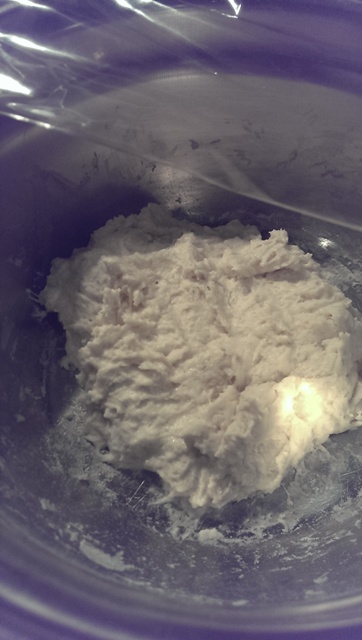
Basically I mixed up all the above ingredients in a large mixing bowl.  After covering it with some saran wrap, I let it sit out on the counter for about 2 hours before putting it into the fridge.

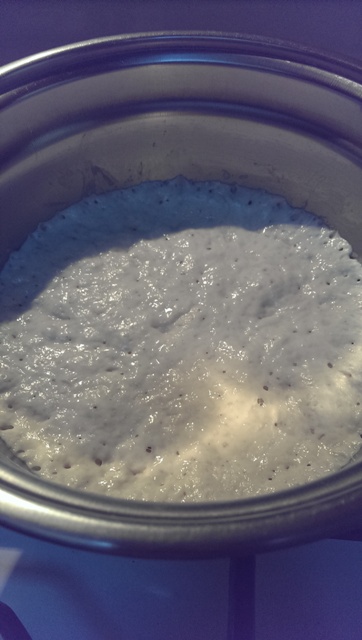
img_20161218_201018
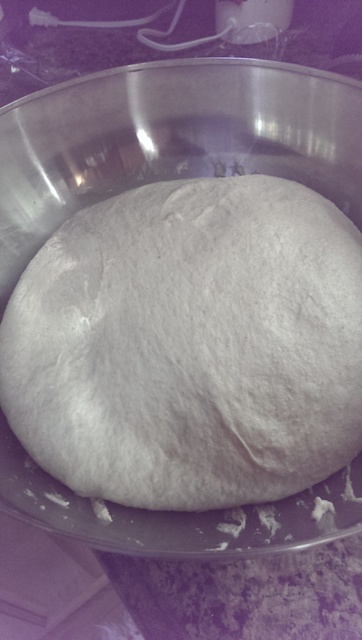
After mixing, before letting it sit for 2 hours on counter
img_20161218_222039
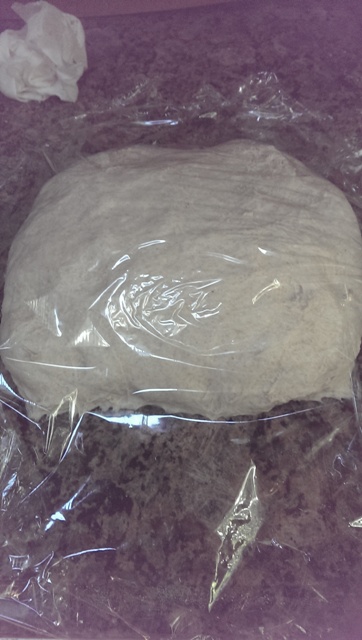
After 2 hours on counter

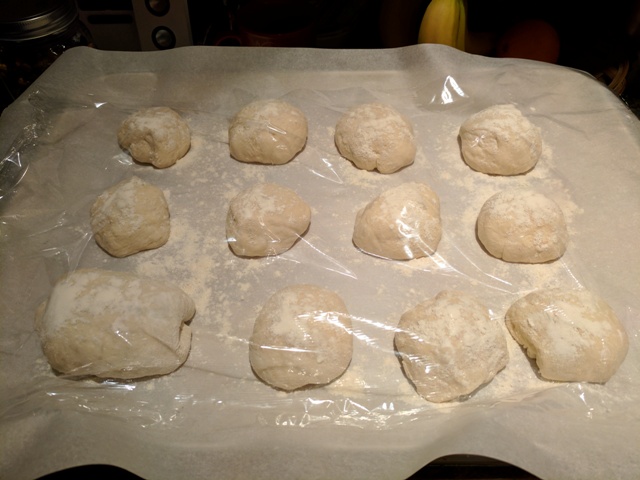
I made up this mixture on Sunday and pulled it out of the fridge on Tuesday evening to make for a Wednesday lunch potluck.  I like how simple the recipe is because after removing it from the fridge, I layed the dough out on my well floured countertop and shaped the dough (no kneading, no stretch and fold, no additional manipulations).  Since my scale was not working, I eyeballed the size of each roll.
img_20161220_205746

Each roll was dusted with some flour.  I covered the rolls and let it sit at room temperature for about 1-1.5 hours to allow it to rise/proof.  After this time, I checked the roll by depressing a finger into the dough.  The dough sprung back about halfway.  During the proofing, I preheated the oven to 450 F.  The recipe calls for using a pan in the bottom of the oven to create steam.  Rather than fussing with this and tossing in water into a hot oven, I elected to just use my water bottle sprayer.

Once the dough was ready, I took a knife and made some slash marks on top of each roll.  I placed the parchment lined cookie sheet of dough into the oven and sprayed the inside with 5-6 spritzes of water before closing the oven door.  Initially I let the bread bake for 10 minutes, then opened the door and quickly spritzed some more water into it.  I then let it bake for an additional ~13-15 minutes.

img_20161220_225359

As you can see, there were some creases that opened up on the sides of the dough.  This was most likely due to my not tightly rolling the dough balls into a cohesive ball.  Nevertheless I think it gave them a more homemade feel.  My coworkers raved and said the bread rolls were good – I didn’t end up getting to try one.

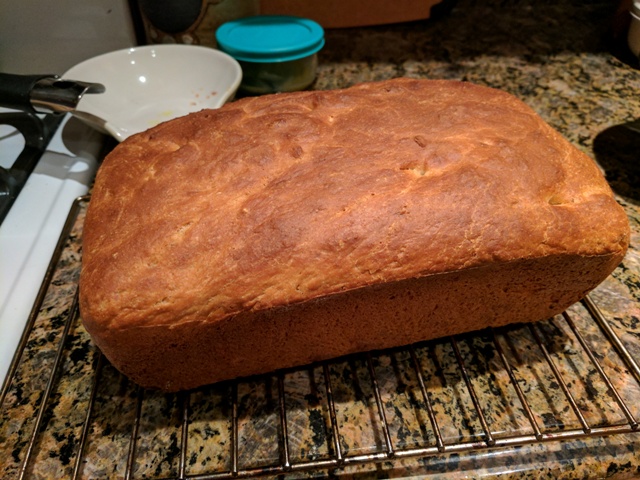
I also attempted to re-create the honey wheat rolls.  However, as described above my scale wasn’t working properly, I had to eyeball the ingredients with volume (measuring cups) rather than weight.  I also tweaked it slightly and so when I had my wife pull it out and start the stretch and fold process (as I had previously done: here), the dough did not come together like I had hoped.  It remained a very moist gloopy mess that you could not form.  In an attempt to salvage it, I put the wet dough into my loaf pan to see if it would at least attempt a rise.  Luckily the dough actually did rise somewhat (maybe 1 inch in the pan) and I tossed it into the oven and hoped for the best.  Overall it didn’t get the oven spring that you’d normally see but it baked well and actually had decent crumb.  Wasn’t my best effort but was still good.
img_20161220_225404

I’m excited to see what I will continue to try doing in 2017!

-StewsCat

Sourdough boule – with homemade starter

Sourdough boule – with homemade starter

I don’t know if I’ll ever get around to posting about making my own sourdough starter but this week’s bake involved using that homemade starter.  Using starter from the fridge does require a bit of advanced preparation as you need to “wake” your starter up and get it up to snuff to bake with.  On Thursday I pulled my sourdough starter out of the fridge (it had been in there for about a week).  I split it in half, fed one half and let the yeast eat for awhile (i.e. get some bubbles going) and then replaced that back in the fridge.  The other half I removed half of the starter and then fed it with 1/4 cup water and just under 1/2 cup of flour.  Previously I had been feeding the starter based on weights but decided for this week’s bake I would switch to using volume because it is much quicker using a measuring cup instead of getting the scale out.  I continued feeding the starter around every 12 hours for the next 3 days until I had an active bubbly starter.

Sunday morning I fed the starter one more time then waited about 4 hours (I read that is when the starter is most active).  I  haven’t used the sourdough starter by itself as the only source of yeast so was interested to see how this would turn out.  My recipe was as follows:

  • Sourdough starter (199 g)
  • Bread flour (500 g)
  • Water (360 g)
  • Salt (10 g)

I deliberately kept this recipe simple as I wanted to see how much sourdough flavor I could get from the starter.  I mixed all of the above together into a wet mess, let it auto-lyse for 30 minutes and then did the slap and fold method for about 15 minutes.  This dough was placed in a clean bowl and allowed to bulk ferment for about 1-1.25 hours.  I was pleasantly surprised to see that the dough had increased by 1.5-2 x it original size.

I proceeded with 3 stretch and folds (envelope style) separated by around 30 minutes each.  I could feel the dough coming together nicely.  After the last stretch and fold, I bench rested the dough for 5 minutes, then shaped it creating a nicely tensioned surface.  I used a well floured towel in a collander and put the dough in there to proof for the final time.  Since I made pizza, the kitchen was warm and after about 40 minutes the dough had proofed to the proper amount.  Instead of using a pre-heated dutch oven I free baked the dough on my pizza stone (steel) using some parchment paper to do the transfer.  I misted the inside of the oven and baked the bread at 500 F for 10 minutes, then dropped it to 475 for another 10-15 minutes or so.  When I saw how much oven spring was present, I realized I hadn’t de-gassed the dough enough during my stretch and folds and forming.  Oops!  Oh well.

You can see the impossibly large air holes in the dough, which makes it hard to use as a sandwich.  The great thing about the bread was that it had that characteristic smell of a sourdough loaf.

Overall this bake was more to see how my sourdough starter would function.  I’m happy with the amount of yeast activity present in the starter and also that it does impart some flavor as well.  It’s quite amazing that this starter was created using just water and flour.  The natural bacteria and yeast from the flour and the environment create this living, breathing organism that can be used to bake bread.  Pretty neat!

Lessons for next time: de-gas the dough properly.

-StewsCat


Sourdough wheat sandwich bread

Quick bread update.  I decided to use more of my sourdough starter to make this week’s 50% whole wheat sandwich bread.  This week I essentially used the same recipe as last week’s but with the addition of the sourdough.

Recipe:

  • 80g sourdough starter (100% hydration)
  • 300g 100% whole wheat flour
  • 255g bread flour
  • 145g rice milk
  • 260g water
  • 18g salt
  • 35g honey
  • 1/4 c. vegetable oil
  • 5g yeast (cut down the yeast to see if the starter has some oomph to create rise)

I combined all the above ingredients into one giant slurry and let it auto-lyse for 30 minutes.  I am always amazed how the dough goes from a ragged mess to a cohesive and firm dough.

I did the slap & fold kneading for 15 minutes.  Each time I do this, I get better and better at sensing/feeling the dough coming together and becoming less sticky.  The first time I did this, I had no idea how long I was supposed to knead for and ended up doing the slap & fold for almost an hour.

After I finished the slap & folds, I put the dough in a clean bowl and let it bulk ferment for an hour.  As seen above, the dough really formed up very nicely.  Following bulk fermentation, I dumped the dough out on my lightly floured countertop and performed a stretch and fold (envelope style) and placed the dough back in the bowl for 20 minutes.  Once more I did a stretch and fold followed by the initial shaping.  This involved de-gassing the dough and creating a square shape.  I then folded the dough down from the top to the middle of the dough and pressed this down.  Subsequently I pulled the dough once more to me and pressed down to seal it (essentially creating a log shape).  I then bench rested the dough for 5 minutes and then re-shaped into loaf shape.  The dough was then placed in a well-greased (butter) 9″ x  5″ loaf pan.

I allowed the dough to proof for about 45 minutes (the kitchen was warm because I was also making pizza).  As with last week, the dough had risen really well.  I did the finger poke test and noted the dough was well proofed.

The bread went into a 425 F oven with water spraying.  I let it bake at this temperature for 10 minutes.  I dropped the oven to 375 F and baked the bread for another 25 minutes.  By this time, the top of the loaf was a nice dark brown color and the internal temp 187.7 F.  I read that enriched bread (which this is) is done between 185-190 F and you can let it go until 205 F if you want a really crunchy crust.  This time I decided to remove it a littler earlier to see what kind of difference it would make (last week’s was around 195 F).

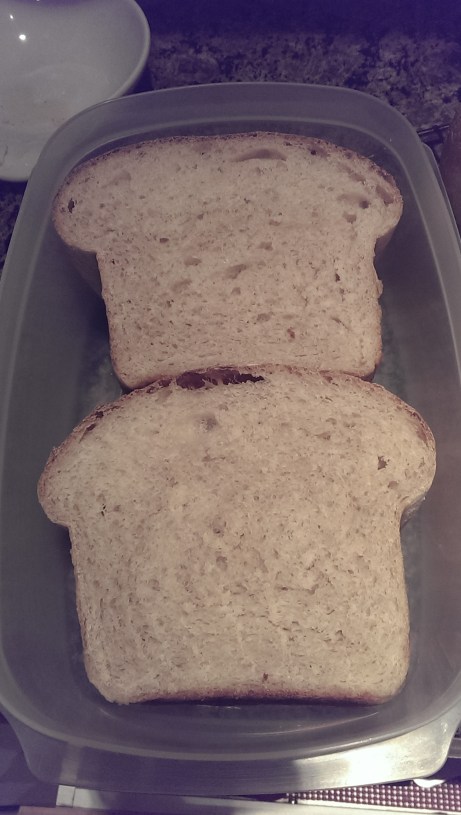
After slicing, I noted that the bread was just slightly underdone.  If you look at the cross-sectional view of the crumb, you’ll notice at the bottom part of the bread, the crumb is a bit collapsed and not well-aerated like the rest of the bread.  Next time I’ll probably try to get it closer to 190 F internal temperature.

IMAG2933
Slightly underdone

This bread turned out good, still a little weaker than I’d like for a sandwich bread.  I wonder if I toasted it before making my sandwich if it would hold up a little better.  The wife said that it is softer than last week’s effort.

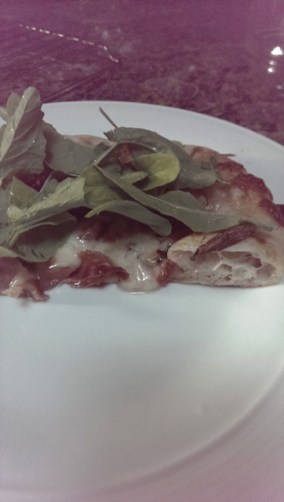
In other news, we were able to top our pizza with some homegrown arugula.  We decided to try some lettuces this year in our raised vegetable beds.  This was a first and out of the 4, the arugula is the only one that grew well.  There was a different lettuce that initially grew well then one day was all gone.  I am suspicious the local wild turkey came over and chomped it all away.

IMAG2924
Homegrown arugula

-StewsCat

Sourdough baguettes

Sourdough baguettes

In a yet to be published post, I am currently creating my own sourdough starter.  I felt bad discarding 1/2-2/3 of the starter everyday so started looking up recipes on what I could do with that discarded starter.  One thing people recommended was using it for the taste (“sour”) component prior to it being strong enough to act as yeast.  Therefore you still had to use some yeast (active dry in  my case) to help the dough rise.

So I decided to try my hand at baguettes.  I have not attempted this type/shape of dough yet so this was more an experiment than anything.

I found this recipe online and decided to run with it.

  • Flour 100%
  • Water 66%
  • Salt 2%
  • Instant yeast 0.36%
  • Poolish: 33% of the above total.

Poolish (done the night before and allowed to sit overnight at room temp):

  • 60g Sourdough starter (100% hydration)
  • 103g AP flour
  • 58g Room temperature water
IMAG2891
Poolish made the night before

In the morning the poolish had spread out and developed the requisite bubbles to let me know it was working well.

IMAG2892
Poolish in the AM (~12 hours later)

To the poolish I added:

  • 267g AP flour
  • 176g water
  • 8g salt
  • ~1.5g Active-dry yeast

I mixed the above with the poolish until it was well incorporated and let it auto-lyse for an hour.

IMAG2893
Mixed dough after auto-lyse

I followed this with slap&fold kneading for about 15 minutes until I obtained a nice formed dough.  I let this bulk ferment for another hour and then did 2 stretch and folds separated by 20 minutes.

I divided the dough up into the individual baguette sizes and bench rested them for 15 minutes.

IMAG2894
Bench resting

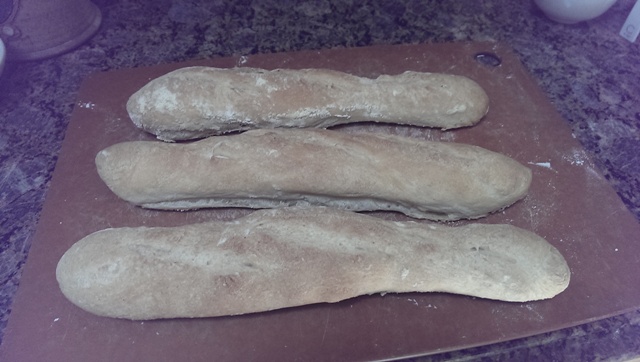
Then I set about shaping the dough.  I followed the video as seen here.   I definitely need to practice rolling out the dough to get an even product.  As you can see below in the final pictures, the baguettes came out a little lopsided.

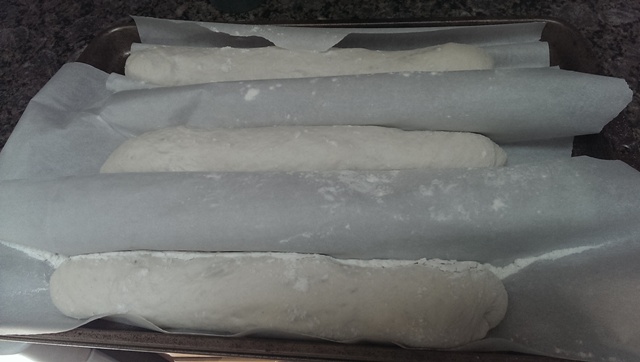
I don’t currently have a baguette bouche so looked up ways to create a homemade one.  What I ended up using was a sheet pan, parchment paper and rolled up table placemats.

IMAG2897
Homemade couche

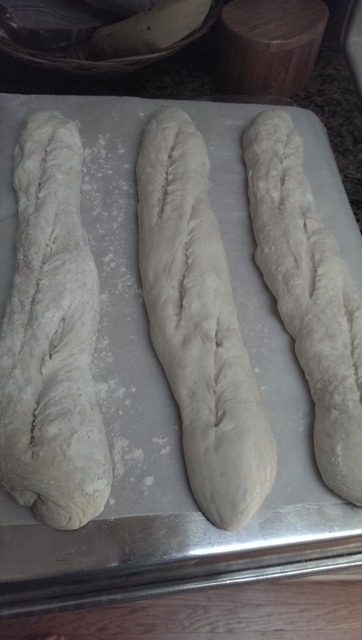
I let these proof for 40 minutes and then turned them out onto my baking system (upside down sheet pan with parchment paper).  Other options I read include transfer to a pizza peel and putting on pizza stone in oven (I can see myself messing this up) or if you have the metal couche, you can bake directly in those.  I scored the baguettes with a sharp razor and did a terrible job of it (I also read that scoring is one of the hardest skills to master).

IMAG2898
Uneven scoring

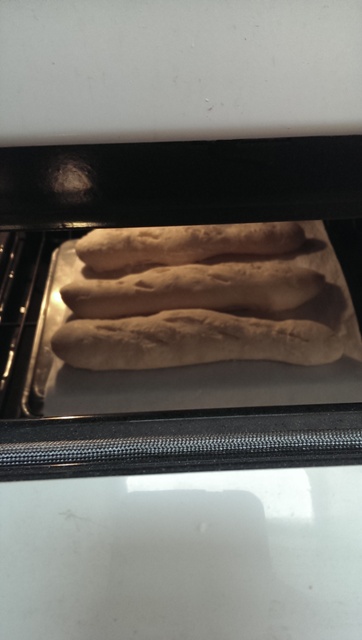
I placed the baguettes in a 450 F oven, sprayed the inside with my trusty water spray bottle and closed the door.  I sprayed the oven walls/bread again at 1 minute and 5 minutes in.  After 6 minutes I dropped the oven to 400 F.

IMAG2899
Good oven spring

I wasn’t sure exactly how long to bake it for as some recipes I read said 12 minutes while others said 24 minutes.  I ended up going closer to the 24 minutes.  The baguettes never developed the deep brown color I was looking for but they were definitely cooked and done.  The wife noted the crust was a bit hard – though from what I read of classic baguettes they are supposed to have a very crispy outside.  All in all not a bad effort for a first try.

There was a mild sour taste to it so I may have to increase the amount of starter that I use to get the taste that my wife likes.

-StewsCat

50% Whole wheat sandwich bread

50% Whole wheat sandwich bread

Since we’ve been suffering from triple digit heat the last week, I wasn’t planning on making bread this week (hot oven just makes the kitchen that much hotter, especially because we don’t actually have an A/C register in the kitchen – I blame the previous homeowner).  However, the wife asked for bread (and/or tortillas) for the week for lunches and of course I obliged with both.  I decided I was going to try a 50% whole wheat sandwich loaf baked in my 9″ x  5″ bread pan.  I started this whole recipe fairly late in the day (around 2 pm Sunday) and with no poolish.  I also did not follow a specific recipe this time.

I did read up on the things you should do when using a whole wheat (whole grain) flour.  The extra outer layer on whole grains basically acts like razor blades when you’re trying to develop gluten.  I elected to do a 50:50 mixture of whole wheat flour and bread flour because bread flour has a higher gluten content and should allow for good rises/proofing.  And while maybe not technically healthy, having 50% whole wheat is healthier than pure white bread.  Other tips I read were to make sure that you included some fats (oil) to help with dough texture.  I incorporated some honey to help with taste.

50% Whole wheat sandwich bread recipe:

  • 300g – 100% Whole wheat bread flour
  • 300g – Bread flour
  • 145g – Rice milk
  • 305g – Water
  • 18g – Salt
  • 35g – Honey
  • 1/4 c. – Vegetable oil
  • 10g – Active dry yeast

I mixed up all the above ingredients and let the well-incorporated mixture rest for 30 minutes to allow the flour to absorb all the water.  I then proceeded to knead the dough for about 14 minutes using the Richard Bertinet slap & fold method.  I could really feel the dough developing good structure this time (before I used to just keep slapping and folding forever not entirely sure that it was developing the gluten structure that I needed).  I know because of the whole wheat and its tiny razor blades I needed to make sure the dough was well kneaded.  After kneading, I allowed the dough to rest in a large bowl for the bulk fermentation.  Bulk fermentation can go anywhere from 1-2 hours depending on temperature.  With the aforementioned heatwave we’ve been experiencing, the inside of the house has been around 81-83 so I knew that rises and proofs most likely would be shorter than I expected.

After about 50 minutes I checked on the dough and it had more than doubled in size (~2.5x original).  I poured the dough out carefully on a lightly floured countertop and did a stretch and fold a few times.  I replaced the dough into the bowl and allowed it to sit for 25 minutes.

IMAG2862
Beautifully formed  dough

The dough had come together nicely (and was not the sloppy wet mess that was my previous attempt at whole wheat bread).   I did the envelope fold which helps de-gas the dough somewhat.  This was followed by a 10 minute bench rest.

IMAG2863
Bench rest

I then formed the dough into the proper shape for the bread pan, ensuring I created a nicely tensioned top portion.

IMAG2864
Shaped for the bread pan (9″ x 5″)

I lightly floured the top of the dough and covered it with a lightweight cloth to proof.  I set the timer for 60 minutes but started checking the dough after about 30 minutes (due to the heat of the kitchen).  I also pre-heated the oven to 425F.  The way to check whether a bread has proofed properly, at least from what I’ve read thus far, is to take a lightly floured finger, press the dough down and see what happens.  If it stays down, it has over-proofed, if it bounces back fully it isn’t ready yet (under-proof) and when it bounces back halfway, then it’s proofed.

I wanted to create that “muffin-top” like look for the bread, the same look you get from store-bought sliced bread.  I had to look up the dough size I needed to create this, since my 9″ x  5″ bread pan is larger than the standard size.  From my research, I came up with a dough around 850-900 grams.  As you can see above, I achieved that look I was going for. I had recently ordered some spray bottles so I could spray the oven/bread as it went into the oven to create that nice top crust.  I popped the bread pan into the oven, sprayed it and shut the door quickly in my 425F oven.  After about 15 minutes, I dropped the temperature to 375 F and sprayed it once more time.  A total of 40 minutes baking created the perfect color and doneness (I checked the internal temp which read around 197F).

Since I’m not planning on cutting it until tomorrow when I make my work for lunch, you’ll just have to check back later to see how the crumb and taste turned out.  Enjoy!

-StewsCat