Pizza dough comparison

Last month I tried a new pizza dough recipe.  A few months before that, I had read in Men’s Health about an easy pizza dough that did not require hours of preparation (I had been using a no-knead dough recipe that required an 18 hour rise (more details below).  I am always looking for both more efficient and tasty recipes for pizza dough.  My wife enjoys the one I had been making but I am all for tweaking and improving so I decided to try this new (to me) recipe.  I was fairly certain I had left the magazine in a spot in my treadmill room but lo and behold it wasn’t there.  I resorted to trying to google the same recipe and don’t know if it was the exact one I had read about initially but I went with it.

Quicker pizza dough ingredients:

  • 6 cups AP flour
  • 2 1/4 cups room temperature water (recipe called for cold water)
  • 1/2 tsp active dry yeast
  • 1 Tbsp kosher salt
  1.  Add 3 cups of flour and 1/2 tsp yeast to 2 1/4 cups of water in a large bowl and combine
  2. In a separate bowl, mix remaining 3 cups of flour with the salt.
  3. I then added in the flour mix to the flour-water combination (from step 1) and kneaded it within the bowl for about 5 minutes.
  4. I let the dough rest – covered – for 30 minutes.
  5. The dough was separated into 4 (relatively) parts and 3 of them saved in saran wrap and frozen for later use.
  6. I split the dough into 2 balls and made pizzas from them.

Continue reading “Pizza dough comparison”

Paris Baguette and Back to bread (whole wheat sandwich bread)

Paris Baguette and Back to bread (whole wheat sandwich bread)

A few weeks ago I ventured out to try some new things after a doctor visit.  I had fasted overnight and before the appointment so I could get some blood pulled.  However that left me hungry after my visit.  I decided to try one of our local coffee roasters that has cold brew coffee on nitro.

IMG_20170811_090546

First impression was that it looked like a beer.  It had a nice foamy head and was nice and chilled.  I must say that when taps use nitro, it certainly makes for a much smoother mouth feel of the liquid.  I thoroughly enjoyed my first cold brew coffee on nitro.  I got the coffee at Chocolate Fish Coffee Roasters.  It’s a quaint little coffee shop that is no frills.

With my coffee in hand, I headed over to the relatively new Paris Baguette.   This chain recently moved up here to northern California after I guess it grew big in southern California.  This bakery reminds me of a Taiwanese bakery called 85 Degrees.  You walk in and grab a tray and all the bread/pastry products are out on trays or in cubbies.  You pick what you want and then take your tray to the register to pay and order drinks as well.  I ended up getting a buttered croissant, chocolate croissant, and a croissant with an italian sausage in the middle.  They were all delicious.

IMG_20170811_091816

———– Continue reading “Paris Baguette and Back to bread (whole wheat sandwich bread)”

Hot dog (hamburger) buns

Hot dog (hamburger) buns

For the 4th of July, we decided to do the ultra-traditional hamburgers and hot dogs.  I decided I’d like to try  my hand at making hot dog buns.  I had previously made some burger buns from a random recipe I found online.  I didn’t realize that you can use the same formula for both hot dog and hamburger buns.  This time I found another recipe on a random blog.  For the most part I followed the recipe that was laid out (since this was my first time making it).  I amended it due to the fact that I don’t have a stand mixer and therefore have to do all my mixing/kneading by hand.  The recipe called for letting the dough rest in the fridge for up to 24 hours so I made up the dough the night before July 4th.

Ingredients:

  • 500g All purpose flour
  • ½ cup warm milk
  • ¾ cup warm water
  • 2 tsp yeast
  • 1½ tsp salt
  • 1 tbsp sugar
  • 1 egg
  • 2 tbsp butter (can use butter as well)
  • extra oil to oil the bowl
  • 1 egg for the egg-wash

First I mixed up the flour, yeast, salt and sugar. Continue reading “Hot dog (hamburger) buns”

Marathon Training Week 10

I got back on track with my running in week 10.  I also changed up my training schedule to try to make it better with my new work schedule.  Rather than running Tuesday/Thursday, I switched it up to Monday/Wednesday.  This also allows me to have a rest day before my long run day (Friday).  This week was a drop-back week for my long run.  I again did a mixed effort run where I did the middle 4 miles of the 10 miler at a quicker pace.  Sadly my “quicker” pace these days is actually not all that fast.  I’m not sure if it is due to the high mileage I’ve been putting in causing me to be more fatigued and slower or if it is age-related (diet-related, weight-related, etc).  I definitely feel okay though know that with the increased days and miles, I’m putting a lot more stress on my body than I have before.  I certainly am quite cognizant of how my body is feeling because I have much experience with injuries in the past.  I definitely do NOT want to hurt myself before this marathon like I did with the last one (that was not a fun experience).   Wednesday’s treadmill run happened after I had dinner and surprisingly wasn’t too bad – considering I did it about 30 minutes after finishing my dinner.  Saturday’s 7 miler also was on the treadmill and I did some long incline walks/runs to try to build some hill mileage into my training.  I probably should be doing more hill type stuff but we’ll see what happens.

Here’s a summary of last week’s running.

( ) = # of miles on my plan

Monday – 4.5 (3)

Wednesday – 4.1 (6)

Friday – 10.03 (10)

Saturday – 7 (8)

Sunday –  4.25 (5)

Weekly Total – 29.88 miles (32)

We’ve not had any rain for a while so things have dried out a bit and all the previous wet weather has caused a lot of plants to blossom early.  It is quite pretty out although my allergies have been driving me nuts as of late.


My long run also took me through some interesting neighborhoods along with a small park that I like because they have an actual restroom (yes I do plan many runs around where I can make pit stops).

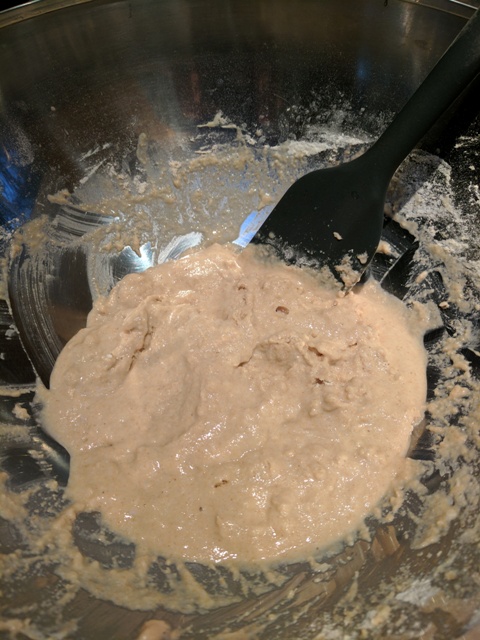
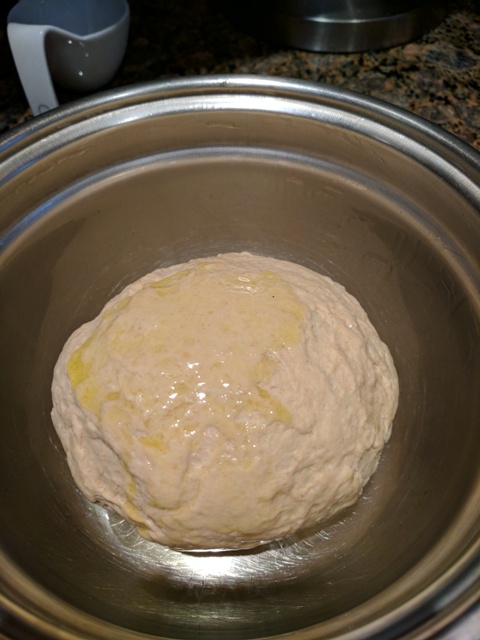
Other fun things that happened this week included making some bread for a work potluck.  One of my coworkers has some health issues so we were all trying to come up with low-fat recipes to bring.  I figured I could just make some bread since I already had some dough sitting in the fridge just waiting for me.  I had made the dough for sandwiches but decided to switch it up and use it for dinner rolls.

I really find it fascinating how yeast works.  I just love watching how bread rises and gets so big!

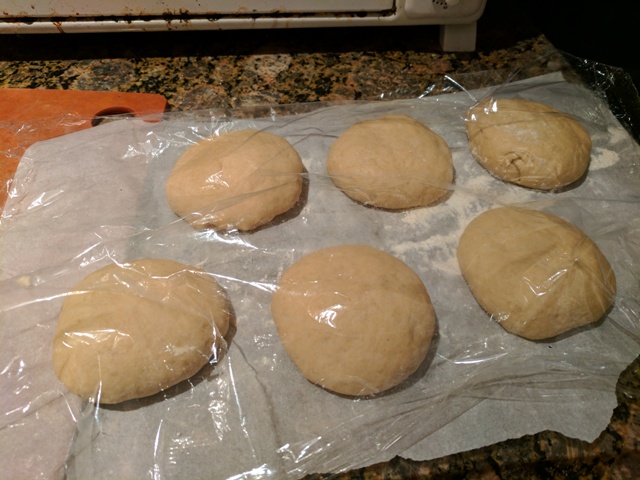
For this recipe, I did an egg wash on the dough and baked it for ~23 minutes (internal temp hit around 205F).  The small cast iron was a tester for my wife to make sure it tasted okay.

I got her approval and took it to work and it was a big hit.

This past week we also hit up one of the local Korean BBQ places, Blue House Restaurant.  We had been once not too long after they opened last year.  They have an “All-You-Can-Eat” option.  I noticed they added a lot more cuts of meat to their selection and as they started bringing meat out I realized they changed up how they were serving it.  When we first came, each meat order came as a large plate of meat.  This time they only brought out essentially a one to two person portion.  This is smart because it allows us as patrons to try more types of meats rather than getting full on just one type.  I definitely went to town and had the Kalbi, Bulgogi, octopus, pork bulgogi, shrimp, chicken.  It was all very good and we cooked it up right at the table.  I’m always a fan of Korean BBQ.  The banchan (“side dishes”) were only okay at this place and not as plentiful as it is at other Korean establishments we’ve visited.

Since it was St. Patrick’s Day, we had stopped by a local micro brew, Sactown Union Brewery, for a few beers before dinner.  I had a Nitro Stout that they just released on that very day called Big Fella and then the Carpe Noctem (a coffee oatmeal stout).  At Blue House, we shared an OB (Korean beer) and a bottle of their Pomegranate soju.   The soju was a bit too sweet for our tastes.

Overall a pretty good week for both running and eating.

-StewsCat

Pita Bread

Pita Bread

So I’ve definitely struggled with what I can make to help us get through the week for lunches while at work.  In the past I’ve done tortillas, loaf bread, and sandwich bread rolls.  D suggested I could make pitas.  So I looked up some recipes and in true me fashion tweaked it to create my own version of things.

Ingredients:

  • 1 cup warm water
  • 2 tsp yeast
  • 1 Tbsp extra virgin olive oil
  • 1 Tbsp sugar
  • 1 cup whole wheat flour
  • 1.5 cup all-purpose flour

I started by adding the yeast and sugar into the water and letting it sit for about 5 minutes.  Then I proceeded to make a poolish with the water/yeast/sugar and whole wheat flour.  I mixed this up thoroughly and let it sit for about 10-15 minutes.

img_20170122_164021

You can see that it is a pretty wet mixture. To the poolish I added the olive oil and the AP flour.  This dough is less water % than many of my breads so came together fairly easily and I hand kneaded for about 5-8 minutes.  I formed the dough into a ball and coated it with olive oil and let it rest for about 1.5 hours.

img_20170122_165459
Before rising

After the dough doubled in size, I punched down the dough and deflated it.  The dough was then divided into 8 balls.

img_20170122_184104

Each ball was then placed on a floured surface and a rolling-pin was used to roll out the dough into about a 6-8″ disc shape.  I had read that there are two different ways to cook pitas.  The oven method creates a great “puff” but the downside is that you don’t get the nice brown spots from the stove top method.  I elected to try both to see which one I felt was better.  I didn’t get the nice separation of the pita as I expected with the stove top method.  I used a cast iron pan for stovetop.  The oven I had at 450 F and a baking sheet (pre-heated).

img_20170122_185038
Rolled out dough

For the pita in the oven, I palmed the dough disc and flipped it onto the baking sheet.  These I cooked for about 3 minutes (sometimes a little more).

The stove top pita stayed flat but I cooked them for about 45 seconds on the first side and 1-2 minutes on the second side.

img_20170122_190046

Here’s a side-by-side comparison of stove top vs oven-baked.

img_20170122_190938
Stove top on the left, oven on the right

Overall they came out decent, though a little dry.  Not too bad and something that may go into the rotation for lunches.

-StewsCat