Beaverton, OR (August 2025)

As we continue in our search for a place to settle, we took a trip back up to the Portland, OR region at the end of August into September. They were experiencing their own heat wave, which actually at least may give us an idea of what it is going to be like moving forward as the whole planet heats up. Their “heat wave” was in the mid to high 80s. While the temperatures were similar to soCal, it didn’t feel as warm, possibly with all the trees and greenery. We also decided to stay in an AirBnB this time instead of a hotel to get a better idea of what “living” there would be like.

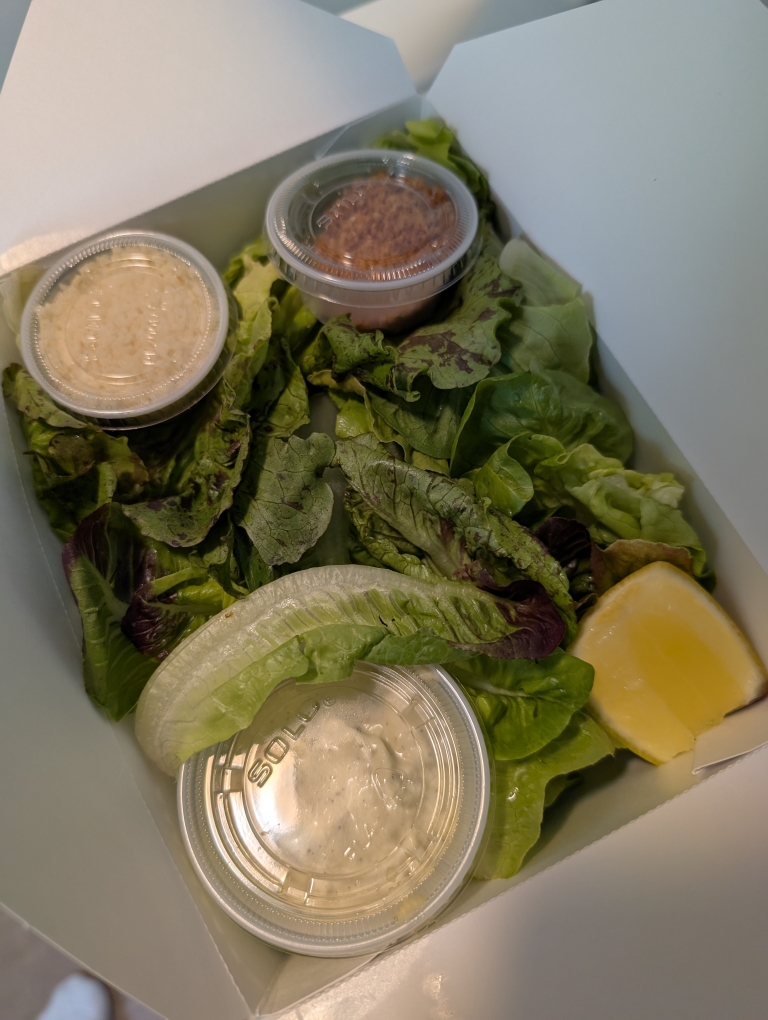
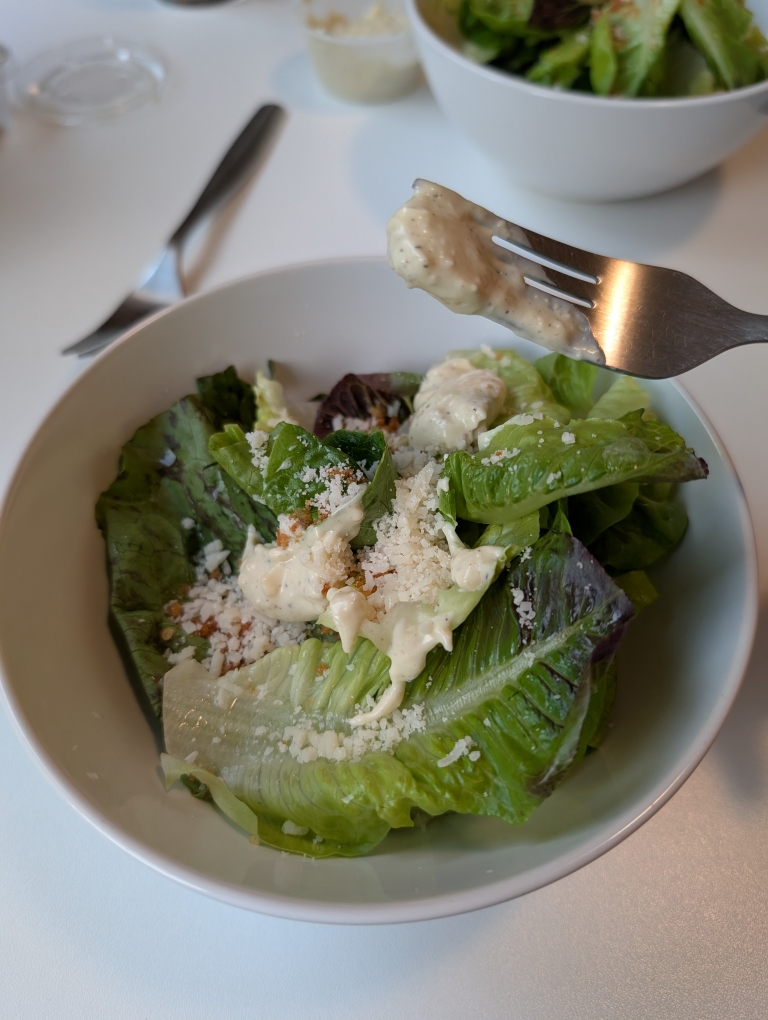
Our flight brought us in just before/around dinner time so after getting our rental car, we stopped at Lovely’s Fifty-Fifty to pick up some pizzas. Lovely’s has been a James Beard finalist and they also use the locally milled flours (we picked up some flour from the mill on our last visit). They were already very busy with wait times of like 1.5 hours (this was a Tuesday at around 5 pm) so we elected to get some to go orders and eat at the AirBnB. We chose two different pizzas along with a salad (semi-healthy)? We had the Fresh Mozz with Basil pizza and the House made fennel sausage with lacinto kale, sleeping beauty, and rosemary.

Overall both very good pizzas. After dinner we swung by one of the local specialty grocer chains (New Season’s market – think similar to Whole foods, sprout’s) to pick up some items for breakfast and some fruit as well.

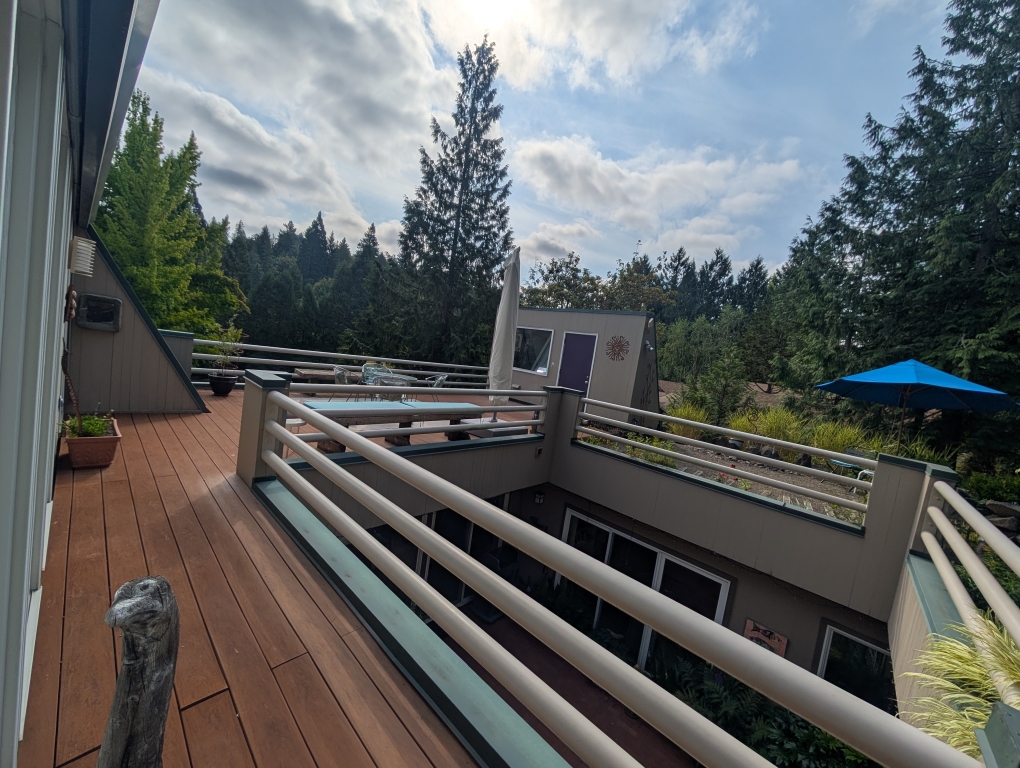
Our AirBnB location was off of Scholls Ferry Road just south of the 26 and east of the West Slope neighborhood. It reminded me of Palos Verdes estates some – very hilly, big nice houses, lots of trees. Honestly aside from the steep hills with no sidewalks/narrow streets, it would be a good place to live, though probably not the best place to be able to walk out of the house and go for a run.

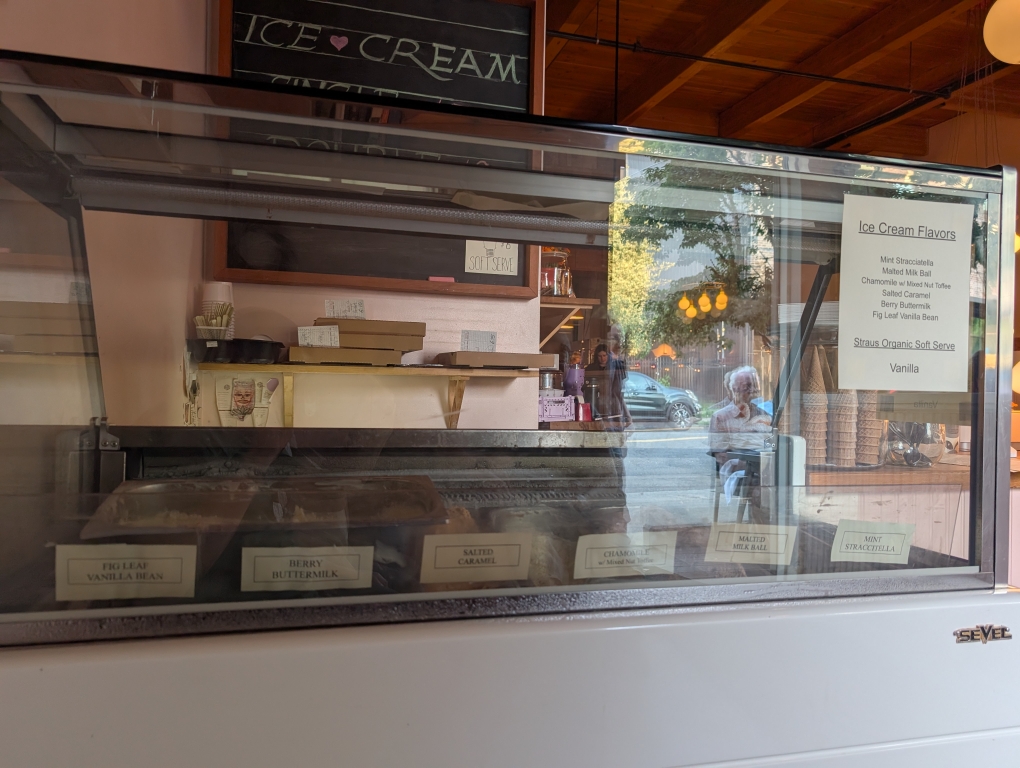
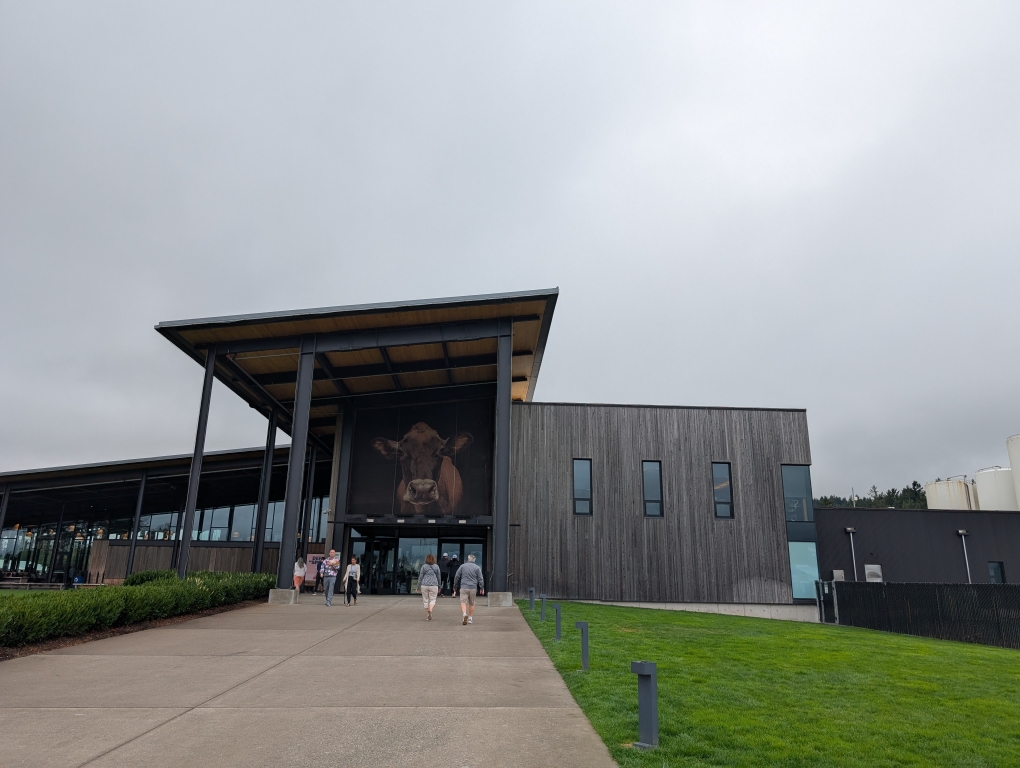
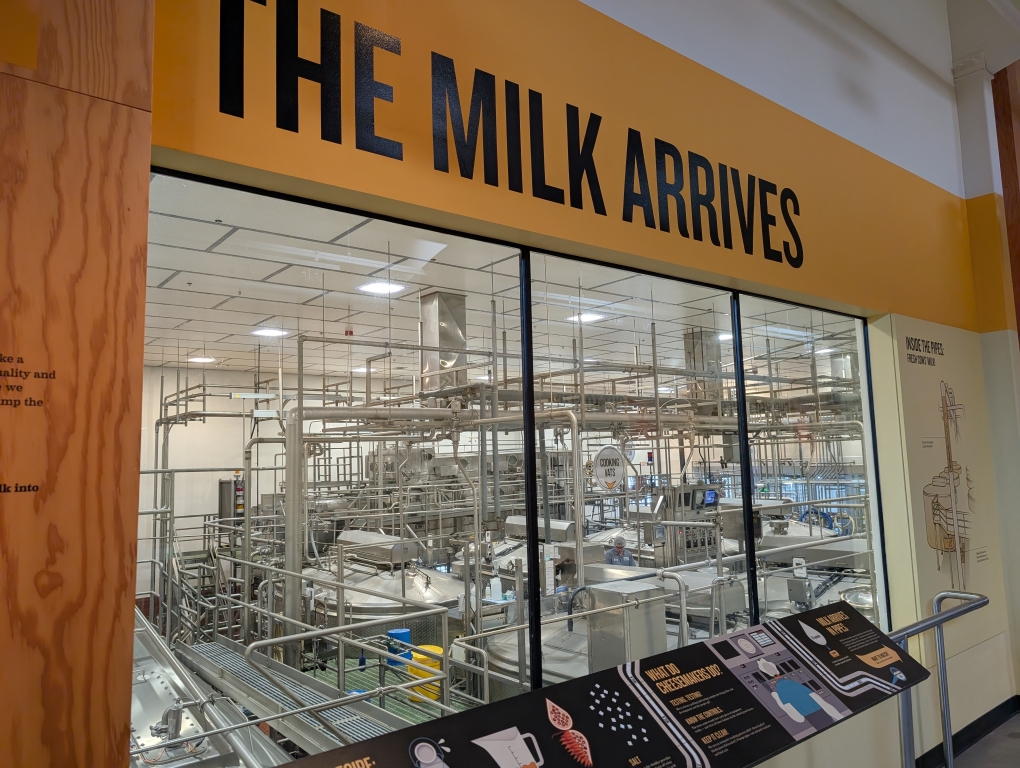
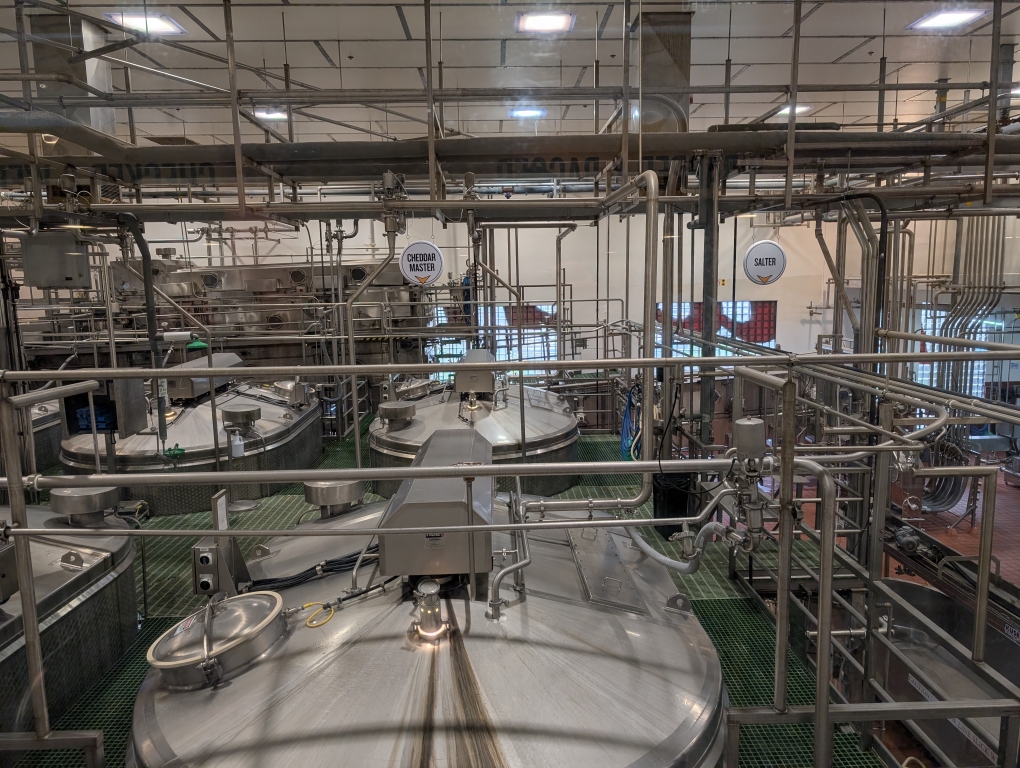
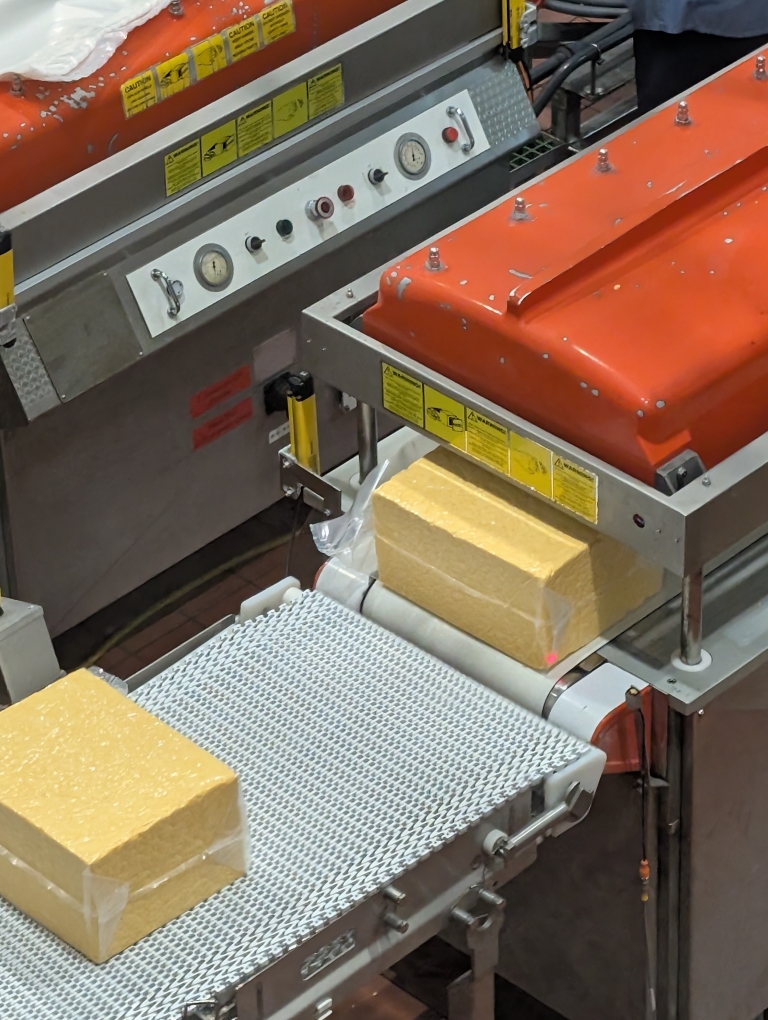
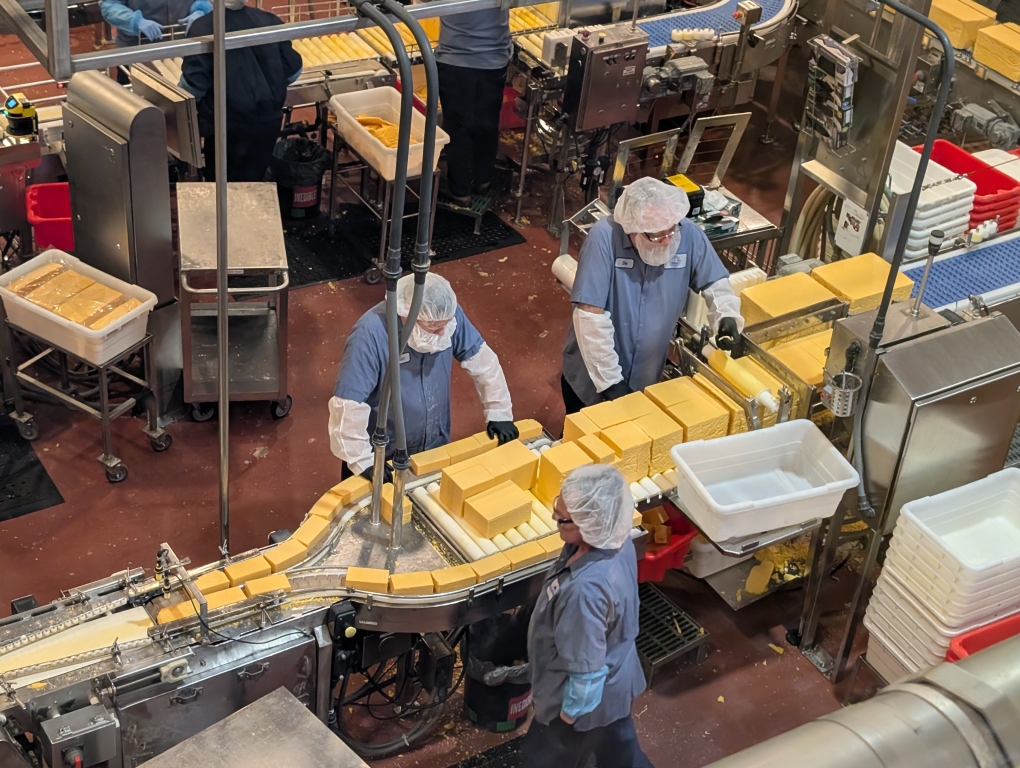
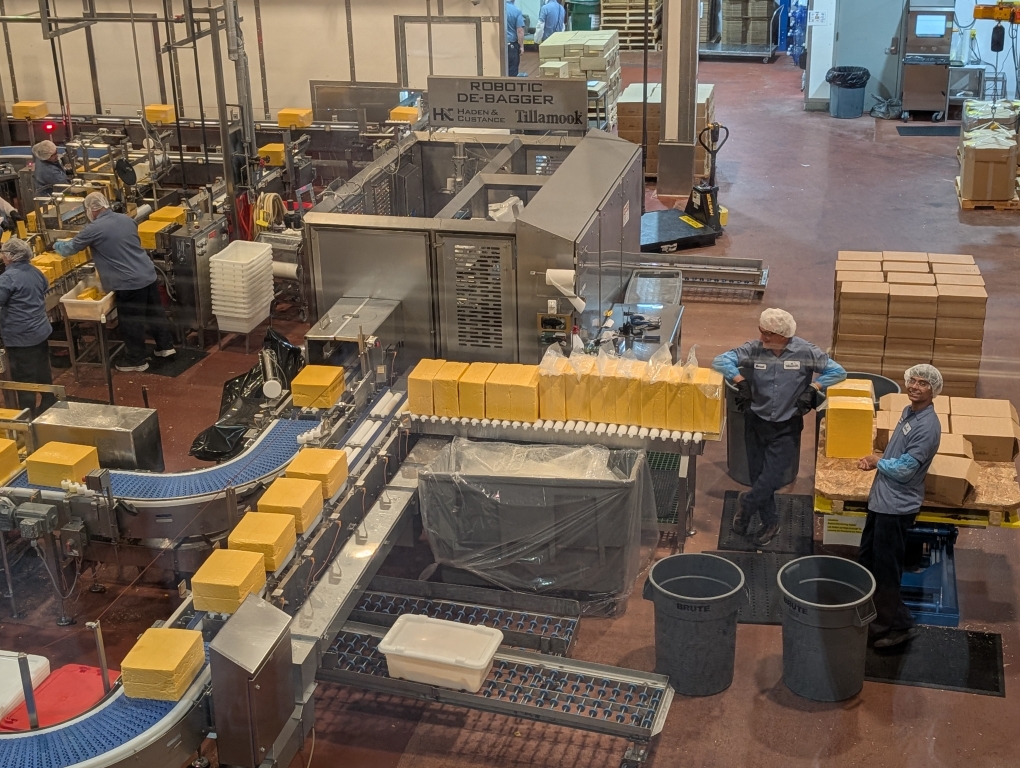
The following morning we decided to do something touristy because we were going to be there for 9 days and figured maybe it wouldn’t be as busy during a weekday (with Labor Day weekend upcoming). Both D and I love our cheese and even in southern CA we busy Tillamook. We hopped on the 26 heading towards the coast and then switched over to the 6 making our way through Tillamook State Forest and popping out at Tillamook right near the Pacific Ocean. Turns out that the school year hadn’t started yet and many people were doing one last trip before the start of the school year so it was fairly crowded at the Tillamook Creamery. You can do a self guided tour on the 2nd floor that overlooks the factory area and packaging. The first floor has a large gift shop area and also a counter order place to get food, ice cream.

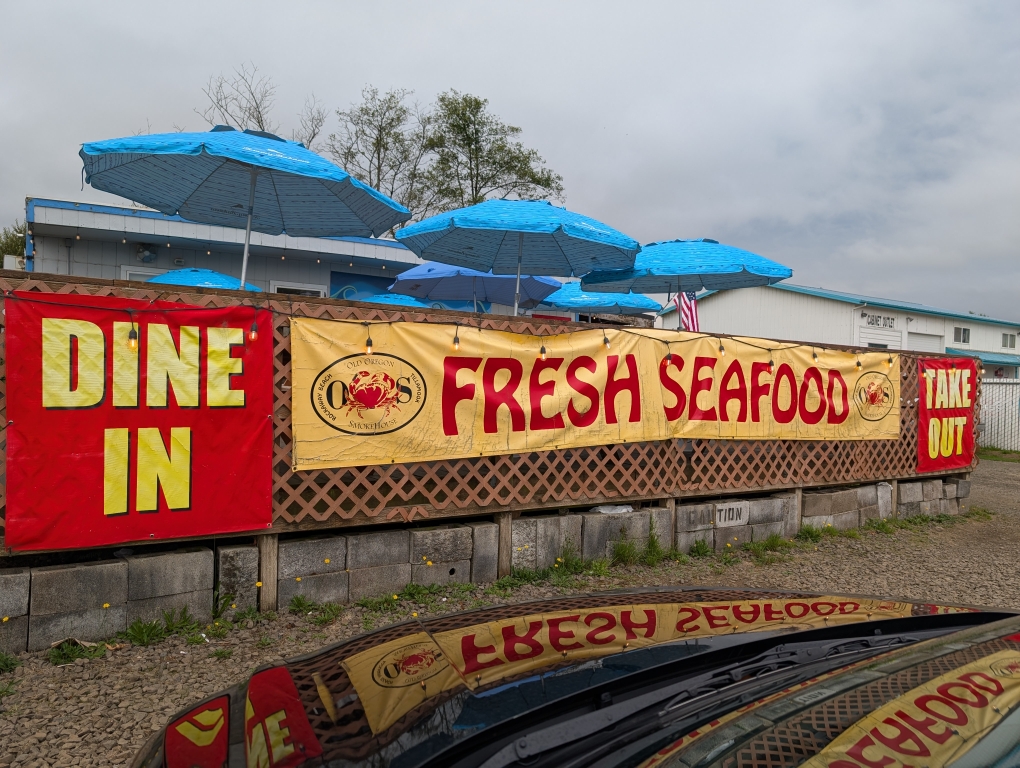
We decided not to get food here and drove down the road to the Blue Heron French Cheese Company. This was a much smaller operation and had more of a local market feel, with just a few blue cheese samples. D ordered a sandwich from here but I saw across from Tillamook was the Old Oregon Smokehouse and I wanted to get some smoked fish, seeing as we were so close to the ocean. I purchased some clam chowder and some smoked salmon and then went back to Blue Heron to eat with D.

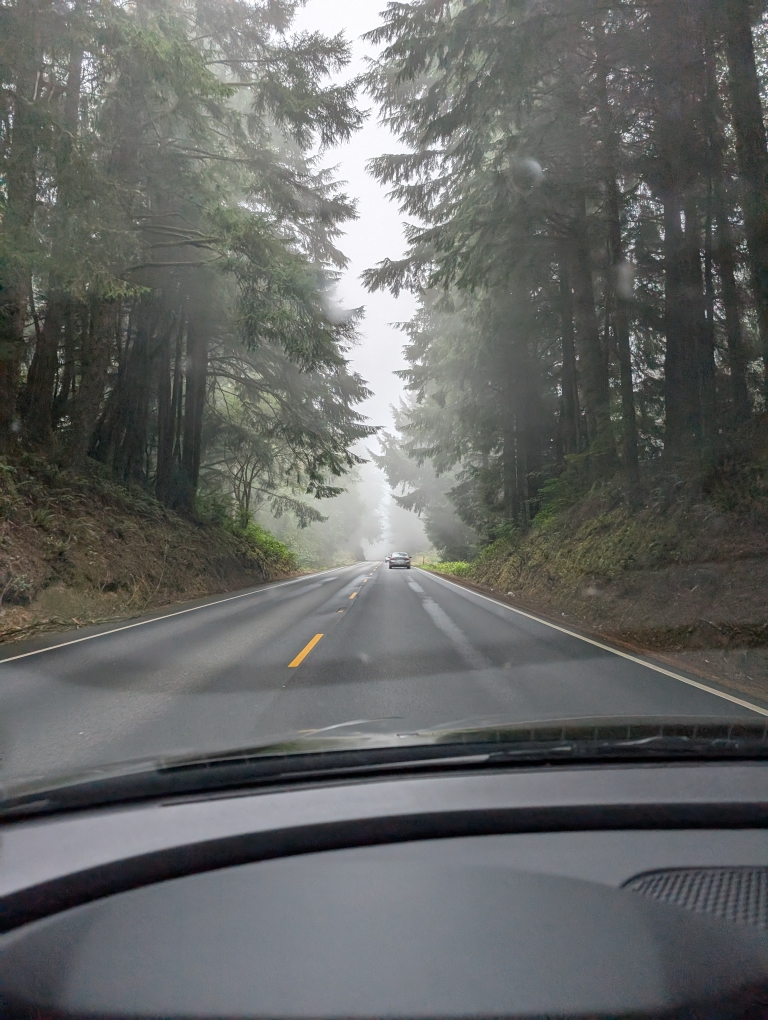
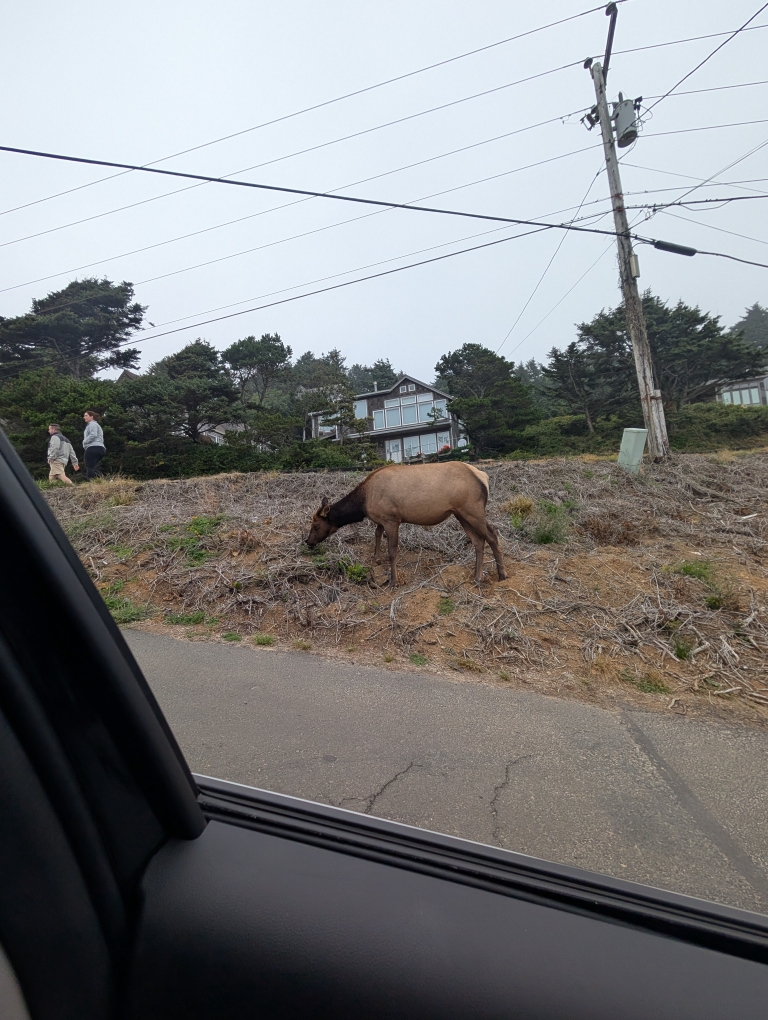
Previously (many many moons ago) I had driven up the Pacific coast with my family and do remember the Oregon coast being quite beautiful especially the beaches with large rock formations just off the beach in the water. D hadn’t seen them before so we headed north up the 101 past Bay City, Rockaway Beach and over to Cannon Beach. Unfortunately it was a very overcast foggy day so difficult to see the rock formations. We did walk around the downtown shops and drove back to see Haystack rock some. As I was making a turn onto a street, suddenly we were confronted by 3 large elk hanging on the side of the road. And then down a smaller street there were maybe a herd of 15-20 just laying down by people’s houses. D looked it up and I guess the Roosevelt elk like to hang out in this area.

Homemade ragu

Homemade ragu

Many years ago now on an episode of No Reservations, Anthony Bourdain was in Italy visiting and ended up having Sunday dinner at one of their local minder’s (or cameraman) grandma’s house. Very commonly they make a Sunday gravy or Ragu that is cooked all day. At the end of it, you have a wonderfully deep ragu sauce along with a plate of meat (that is used to flavor the sauce as it cooks). From what I remember, you have the ragu sauce on some pasta and then can eat the meat separately. There isn’t a specific recipe and many people have basically just put together the ingredients by watching the episode closely. I think I first made this dish back in 2011 for D’s birthday. Since then I probably try to make it at least once a year.

Since there isn’t a specific recipe that I follow, I just kind of go with my gut in terms of amounts. Also I have done variations depending on the availability of products (usually the types of meat that I can find). Here’s a rough outline of what I do and what I put in it (again these recipes are usually for me to reference in the future rather than trying to find where I originally used a recipe).

  • Tomato Puree (1 jar)
  • Crushed/diced/whole canned tomato (28 oz)
  • Garlic (1-4 cloves)
  • Onion (yellow, sweet)
  • Beef stock / chicken broth / water (have done all of these before)
  • Pine nuts
  • Raisins
  • Rind of parmigiana Reggiano
  • Fresh basil
  • Sweet Italian Sausage (2-4)
  • Beef ribs / cap of beef rib / veal / Braciola
  • Bay leaf
  • Dried Oregano
  • Salt/pepper
  • Extra virgin olive oil
  1. Brown meats in large stock pot, then remove
  2. Sauté onion (diced), then add garlic (sliced)
  3. Add tomato puree and other tomato products, add bay leaves
  4. Wrap pine nuts, raisins, rind of parmigiana in cheese cloth and tie with string and add to pot
  5. Add in chopped basil
  6. Add meat back into pot with the stock/water (and oregano)
  7. Bring to boil then reduce heat until occasional burbling happens
  8. Remove fat that rises to surface
  9. Cook for as long as desired (minimum probably 2-3 hours but could go much longer) – I cooked mine mostly uncovered, stirring intermittently.
  10. Remove meat and cheesecloth and bay leaves
  11. Add Italian parsley
  12. Add pasta water and combine with pasta and top with freshly grated parmigiana Reggiano

This meal we paired it with some pasta and then also roasted some baby broccoli to go with the meat.

-StewsCat

Lasagna

Lasagna

I’ve done lasagna a handful of times now and everytime I do things a little bit differently. I’ve tried it with my homemade dough, traditional dried pasta as well as the oven ready (no boil) noodles. Overall I think I still like the traditional pasta that you boil first. This time I decided to jazz up the recipe a bit with some sauteed mushrooms along with italian sausage and I have enjoyed this one the best.

Ingredients for sauce

  • 28 ounce Cento San Marzano peeled tomatoes
  • Tomato Paste
  • Dried oregano / Dried Basil
  • Rind of Parmigiano-Reggiano cheese
  • Bay leaf
  • Salt
  • Garlic
  • Olive oil

Directions for sauce

  1. Sauté dieced garlic in the olive oil in a pot
  2. Add in the tomatoes (crush whole tomatoes with hands), tomato paste, oregano, basil, rind of parmigiano, bay leaf, salt.
  3. Simmer for at least 30 minutes and up to a few hours.

Ingredients for lasagna

  • Sauce from above
  • 1 box of traditional dried lasagna noodles
  • Whole milk mozzarella cheese
  • Ricotta cheese
  • Parmigiano-Reggiano cheese (put in a food processor to make into crumbles for spreading – easier than trying to grate or slice).
  • Cremini mushrooms
  • Mild italian sausage (can also use ground beef, pork, chicken, etc)

Directions for lasagna

  1. Sauté slice mushrooms until soft and tender, add salt for flavoring
  2. Cook sausage (remove from casing and crumble) in some olive oil
  3. Cook pasta (follow directions) and then lay out on a oiled cookie pan to prevent from sticking to one another
  4. Add a layer of sauce to bottom of casserole dish to help prevent sticking
  5. Add layer of pasta
  6. Can create layers as desired – I did mushrooms with sauce and cheese (mozz/parmigiano/ricotta as dollops), then another layer of noodle, then a layer with sausage and sauce/cheese.
  7. Repeat a few more times (depends on amount of pasta and sauce you have)
  8. Top layer: Add sauce and then cheese layer
  9. Cover with aluminum foil and bake at 375 F for 30-40 minutes, then uncover and bake additional 15 minutes.
  10. Let sit for 10 minutes before cutting and eating.

-StewsCat


Enchilada sauce and enchiladas!

Enchilada sauce and enchiladas!

I’m terrible about posting. I realized that I do need to be more diligent about it because I use this as my reference for how to make stuff. I decided to make some enchiladas again. I couldn’t remember how I did it the last time because it had been so long ago. I like making the sauce because then I control the amount of sodium in it. I have used some of the store bought sauces and they are typically salt bombs. The sauce is actually quite easy to make. I’ve got both the sauce recipe as well as the actual enchilada recipe below. We like flour tortillas (I know traditionally it is corn) so for this one I made flour tortillas to go into it.

Enchilada sauce

  • ~ 1 lb tomatillos
  • 1 medium yellow onion
  • 1 anaheim pepper
  • 2 jalapeno peppers
  • Cumin (~1 Tbsp)
  • Mexican oregano (~2 tsp)
  • Salt (~ 1 tsp)
  • Black pepper (~ 1 tsp)
  • Handful of cilantro (I forgot this when I made it)

Directions:

  1. Peel and wash the tomatillos and cut the onion into quarters and simmered in water for 10-15 minutes.
  2. Toasted the anaheim pepper on stove flame
  3. Add tomatillos, onion, and ~3/4 cup of water to blender
  4. Add remaining ingredients to the blender and blend until desired thickness/consistency
  5. Simmer sauce in pot for 10-15 minutes
Ingredients – 2 jalapenos gave the sauce a little more kick
Boiled for 10-15 minutes

Enchilada recipe

  • 2 cups enchilada sauce (see above)
  • Shredded chicken breast
  • Cheese (monterey jack, mexican blend, cheddar, mozzarella) – whatever your heart desires
  • Tortillas (corn or flour) – I ended up making my flour tortillas because we enjoy them better than corn overall

Directions

  1. In a casserole dish, add some sauce to line the bottom of dish
  2. Dip and cover both sides of tortilla in sauce, add ingredients (in this case it was a mixture of the chicken and cheese)
  3. Roll tortilla and place into casserole dish.
  4. Repeat process until casserole dish filled with rolled tortillas
  5. Cover in sauce and then cheese
  6. Bake at 350 F for 30 minutes covered, then uncover and bake additional 5-10 minutes.

-StewsCat

Flour Tortillas

Flour Tortillas

This is an oldie but a goodie.  I can’t believe I haven’t made a post about this before.  Quite a many years ago I decided to try my hand at making flour tortillas.  I had heard they were more difficult than corn.  It took me a couple of tries before I became more comfortable with it.  I then took a few years off where I didn’t make them so had to re-teach myself.  I figured I should actually document it so I have something to reference.  I made some easy fajita/tacos tonight using these tortillas.  I generally will re-heat the tortilla on an open flame of my oven for ~15 seconds on each side.

00000IMG_00000_BURST20200405182034056_COVER

Ingredients

  • 3 cups AP flour (you can also incorporate a % of wheat flour to make it “healthier”)
  • 1 cup hot water (almost boiling)
  • 1 tsp baking powder
  • 1 tsp salt
  • 1/4-1/3 c oil (instead of lard)

Most original recipes call for the use of lard.  I have never had lard in the house and read about using oil as a substitute so that’s what I’ve been using (either canola or vegetable oil).  For the pictures below I actually made a smaller batch (2 cups flour, 2/3 c water, etc).

  1.  Mix up the flour, baking powder and salt in a bowl.  Add in the oil and incorporate it with the dry mixture.  Heat water til near boiling.  Add water and mix/knead for about 3 minutes.  Exact water may depend on environmental conditions – dough should come together into smooth ball without being too dry.
  2. Cover in a damp towel/cloth for about 20 minutes.
  3. Separate dough ball into individual smaller balls and roll into slightly than larger golf ball size balls
  4. Cover again with damp towel/cloth and let sit for 30-50 minutes.
  5. Take each ball and flatten into disk/hockey puck shape.  Place small amount of flour on each side of puck.  On a well floured counter using a rolling pin to roll out doughball into tortilla shape.  Can roll out into 1/8″-1/16″ thickness depending on preference.  Rolling can be tricky.  I’ve found that I’ll roll it out North to South, then pick it up and turn it 45 degrees and continue to attempt to make it round.  It’s okay if it isn’t fully round.  Still tastes great!
  6. In a hot cast iron pan (or comal if you have one), place tortilla down and let sit for 40-50 seconds (depending on temperature of pan).  Using flat spatula, flip and cook another 30-45 seconds.  Can look for small brown spots to give an indication of doneness.

Continue reading “Flour Tortillas”