I used to work and live in the San Diego region for a year about 15 years ago. A former colleague of mine let me know she was retiring and moving away and so we decided to head down for a few days to see her and just enjoy San Diego. Unfortunately we have been on the mend from our first bout with COVID so weren’t 100%. At least I was no longer shedding so I felt okay still visiting. After moving back to southern CA last year, it’s a relatively short drive down to SD. We left on a Sunday morning making the drive that much easier without any traffic. Our AirBnB wouldn’t be ready to check in until the afternoon so we headed straight for Pacific Beach (PB) to get some lunch.
We haven’t been down to the area in probably 10 years now so I had done some research on food places. We settled on the Pacific Beach Fish Shop. This place is unique in that you choose the fish and then the means of getting it into your mouth (taco, salad, sandwich, plate). D had two of their pre-made recipe tacos: TKO Taco (Mahi Mahi) & Pineapple Express taco (Mahi Mahi) while I had their fresh catches of the day: Halibut taco & Rockfish taco. Overall I think they were tasty though one of D’s fish was kinda dry and there wasn’t any sauce on that one. We grabbed some coffee two doors down at Elixir Espresso Bar.
We then made our way over to the actual beach in Pacific Beach (we tend to go towards Law Street Beach). It had rained very briefly while we were getting coffee but cleared up by the time we made our way to the beach, though it was still quite windy so we didn’t stay too long.
In a yet to be published post, I am currently creating my own sourdough starter. I felt bad discarding 1/2-2/3 of the starter everyday so started looking up recipes on what I could do with that discarded starter. One thing people recommended was using it for the taste (“sour”) component prior to it being strong enough to act as yeast. Therefore you still had to use some yeast (active dry in my case) to help the dough rise.
So I decided to try my hand at baguettes. I have not attempted this type/shape of dough yet so this was more an experiment than anything.
I found this recipe online and decided to run with it.
Flour 100%
Water 66%
Salt 2%
Instant yeast 0.36%
Poolish: 33% of the above total.
Poolish (done the night before and allowed to sit overnight at room temp):
60g Sourdough starter (100% hydration)
103g AP flour
58g Room temperature water
Poolish made the night before
In the morning the poolish had spread out and developed the requisite bubbles to let me know it was working well.
Poolish in the AM (~12 hours later)
To the poolish I added:
267g AP flour
176g water
8g salt
~1.5g Active-dry yeast
I mixed the above with the poolish until it was well incorporated and let it auto-lyse for an hour.
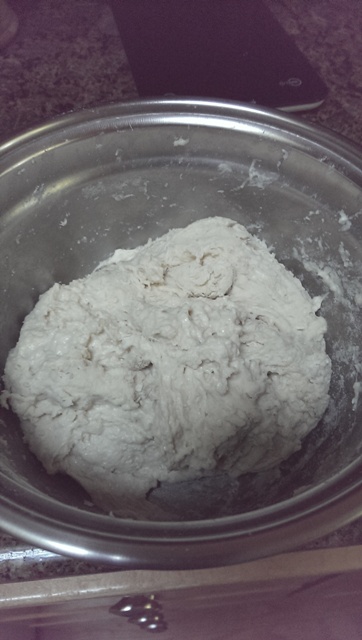
Mixed dough after auto-lyse
I followed this with slap&fold kneading for about 15 minutes until I obtained a nice formed dough. I let this bulk ferment for another hour and then did 2 stretch and folds separated by 20 minutes.
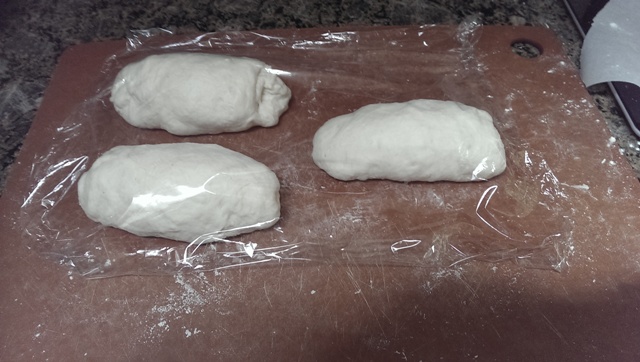
I divided the dough up into the individual baguette sizes and bench rested them for 15 minutes.
Bench resting
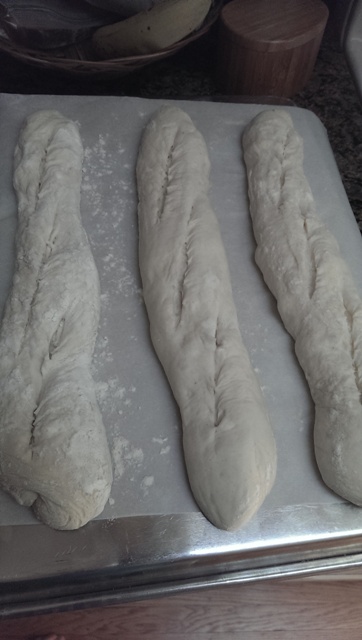
Then I set about shaping the dough. I followed the video as seen here. I definitely need to practice rolling out the dough to get an even product. As you can see below in the final pictures, the baguettes came out a little lopsided.
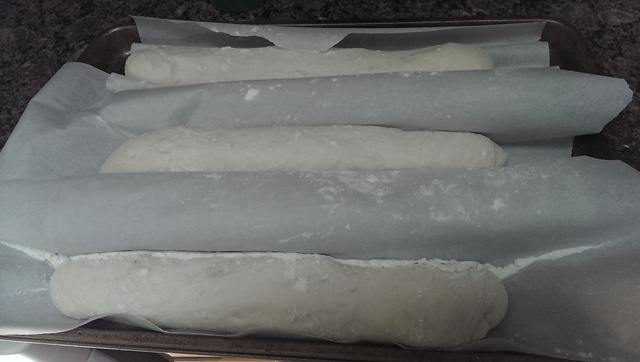
I don’t currently have a baguette bouche so looked up ways to create a homemade one. What I ended up using was a sheet pan, parchment paper and rolled up table placemats.
Homemade couche
I let these proof for 40 minutes and then turned them out onto my baking system (upside down sheet pan with parchment paper). Other options I read include transfer to a pizza peel and putting on pizza stone in oven (I can see myself messing this up) or if you have the metal couche, you can bake directly in those. I scored the baguettes with a sharp razor and did a terrible job of it (I also read that scoring is one of the hardest skills to master).
Uneven scoring
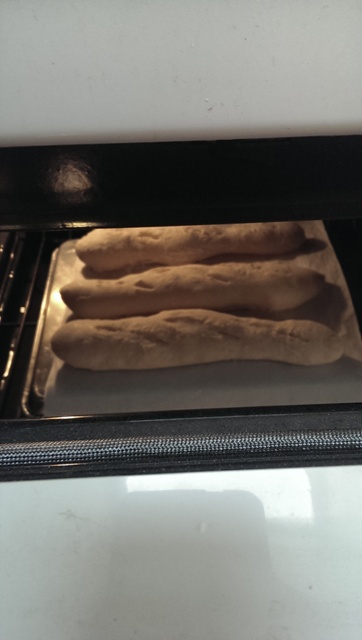
I placed the baguettes in a 450 F oven, sprayed the inside with my trusty water spray bottle and closed the door. I sprayed the oven walls/bread again at 1 minute and 5 minutes in. After 6 minutes I dropped the oven to 400 F.
Good oven spring
I wasn’t sure exactly how long to bake it for as some recipes I read said 12 minutes while others said 24 minutes. I ended up going closer to the 24 minutes. The baguettes never developed the deep brown color I was looking for but they were definitely cooked and done. The wife noted the crust was a bit hard – though from what I read of classic baguettes they are supposed to have a very crispy outside. All in all not a bad effort for a first try.
There was a mild sour taste to it so I may have to increase the amount of starter that I use to get the taste that my wife likes.